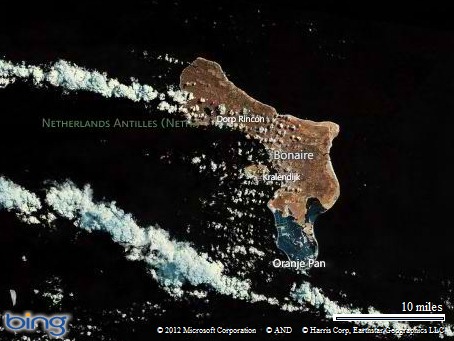
Bonaire

Map picture

Christine and I just returned from a week in Bonaire.  When I told friends that we were going to Bonaire most of them hadn’t heard of it before.  I hadn’t either until sometime this fall when someone at work mentioned it.

Bonaire is in the south end of the Caribbean, just north of Venezuela.  It is best known by scuba divers (for it’s pristine reefs, most of which are accessible from shore) and wind surfers.  We came primarily for the scuba diving, and it was just incredible.  There are about 50 dive sites located down the west side of the island, and almost all of them can be accessed from shore (saving a lot of money compared to diving off of a boat).  There were reefs with countless wildlife and cool double reefs with interesting underwater topography.  The reefs have been protected as part of a Marine Park for 30 or 40 years and as a result are in very good shape.  They strictly forbid touching anything underwater, fishing, anchoring boats, or anything else that could damage the marine infrastructure.  The water is also very clear here, and a lot of the good diving was at 50’ or less, allowing for long dives (the deeper that you go the more quickly you consume air and the longer breaks that you require between dives).

Almost all of the tourists are here for the diving, but it still didn’t feel crowded.  I went on 11 different dives in 6 days and we only saw other divers 2 or 3 times.  Since everything was shore accessible we didn’t have to go with a guide or in large groups.  It was really relaxing to dive at our own pace and whim.

Our favorite dive sites were Something Special (for the amazing quantities and diversity of fish), Angel City (a really cool double reef,where you can swim along a valley between two reefs),and Tolo (great coral and fish).

IMG_4471

IMG_4493

IMG_4641

IMG_4365

img_4543

IMG_4578

P1010806

P1010954

This is what a couple of the diving beaches looked like:

IMG_4536

IMG_4408

I also brought my new S&S coupled travel bike with me.  In the mornings I’d let Christine sleep in while I went for a ride (hopefully before it got too hot).  The islands paved roads have little traffic early in the morning and there is essentially no traffic on the dirt roads.  The ride to the south went around large salt flats, past some old slave cabins, and was along the coastline the entire time.  It was dead flat though, and had a headwind, which made it a bit less attractive to me.  I preferred to go north where the island has more interesting terrain and better views.  I loved the riding here and would bring a bike again.  My favorite 3 or 4 miles of riding were along the Queen’s Highway, a narrow (one lane) road along the northwest coast which has no traffic, rolling hills, and great views.

North Island:

When I ride with John we get stuck behind cows.  When I ride out here I get stuck behind donkeys.

IMG_4413

P1020032

P1020037

P1020049

South Island:

P1010853

P1010854

P1010856

P1010862

One morning Christine woke up early with me and we drove the south loop at dawn looking for the native wild flamingos that live here (one of their 4 breeding grounds in the world).  There are about 10,000 of them on the island, but they mostly avoid humans and can be hard to find.  During the day many of them fly to Venezuela (about 80km/50mi away) to eat, then return here in the evening.

P1010928

P1010941


P1010920

On our last day here (when we couldn’t go diving) we drove up to Washington Slagbaai National Park and explored.  This area covers about 15-20% of the land area of the island and had the most rugged beaches and best birding of anywhere on the island (it was a lot easier to find the Flamingos here, but we also saw more Pelicans, Parakeets, and other small tropical birds).  It was a great way to finish up the trip and doesn’t seem to be well visited.  We drove the whole way through the park (on a very rugged road) and saw less than 20 other cars.

P1030014

P1010977P1010981P1010986P1010991P1010998P1030037

P1010953-2P1030040P1030041P1030042

Overall we had a great trip.  I loved the diving, the riding, and the simplicity (there are few large resorts and food was reasonably priced).  Compared to Hawaii it was a lot less developed.  Compared to Mexico or Jamaica it felt a lot more integrated, with houses intermixed with the hotels instead of trying to put up a pretty façade around the tourists to hide the realities of local living.

We still have many more dive sites to explore, so I’m sure we’ll be back in a few years!

P1010899-2

Travel Gifford

On my last blog post I mentioned a secret project.  I built an adventure touring bike (basically the same geometry as Gifford) that uses S&S couplers to make travel easier while waiting for the dropouts to arrive for my other frame project.  I’m really happy with how this one came out, especially since I started it only 4 weeks ago.  This also makes it the first complete bicycle to come off of my new frame fixture.

As I mentioned it is very similar to Gifford.  The head tube angle is 73 degrees and the seat tube angle is 72.5 degrees.  It is built for 26″ (559mm) wheels because they pack a bit more easily into S&S cases and it will be easier to find replacement tires in foreign countries.  There is tons of tire clearance, the photos here show it with 50mm knobby tires and fenders will fit above those.  I’ll probably run it with 45mm or so slicks most of the time.  The 60mm knobby tires from my mountain bike even fit.

The frame is a bit larger than the other Gifford to make it on the slightly large size for me and to make it fit many of my taller friends who might use this as a loaner bike.  Sizing is about the same as a 60cm Long Haul Trucker.  This one is also built with derailleurs instead of a Rohloff hub to keep costs down.  Tubing is similar to the first Gifford, Columbus SL (standard diameter 9/6/9) front triangle, the same Nova single bend chainstays, and some True Temper oversized seatstays that looked good to my eye.

It will eventually get a coupled porteur rack to go along with it.  It is shown here only partially assembled because my friend Andre is going to do the rest of the assembly and give it a test ride.  He is interested in this style of bike and is waiting for the next batch of Rawlands rSogn frames to be made.  In the meantime he’ll get to use this one for a few months.

Lots of tire clearance up front under the Pacenti Biplane crown

Lots of tire clearance in back too. The oversized double taper seatstays will make the braking firm.

The seatstay cluster is fairly plain, but gets the job done. This is the trickiest part of the bike for me to get right.

Single bend chainstays clear 48/38/24 chainrings (barely) and provide good tire clearance.

There are more photos on my smugmug site.

I’m going to be asked how I got the S&S couplers.  These were removed from a damaged frame  but where the couplers were intact.  I cleaned them up carefully and reused them.  It would be nice if S&S sold them to hobbyists, but I understand why they don’t.  I really enjoyed working with the couplers, they must be the most precise lugs ever made.  The fit was perfect and they have very nicely tapered edges.  I inserted the couplers into my downtube and toptube before they were brazed into the frame, but after the tubes were mitered and fit to my jig.  That method seemed to work nicely for me, and the couplers have perfect alignment.

I’m really excited to get this one on the road.  I have a bit of travel coming up soon and may bring the bike with me, even though I hadn’t really planned on bringing a bike.  In the meantime I look forward to hearing what Andre has to say about the ride.

Snow Day

It’s been quite on the blog since I’ve been busy working away on a top secret project and traveling for work.  The blog should pick up soon.

Today Seattle has a few inches of snow.  The last time that we had snow like this was Christmas 2009.  I woke up early and enjoyed a nice ride in the stuff with Rory.  I’m glad to get to ride it in once in a while, but I’m happy not to have to commute in it on a daily basis.

Secret project hint: It is a variation on Gifford, my adventure touring bike.  Here is a teaser (that is a 48mm wide tire):

Seat tube angle adjustment on the frame fixture

There was some confusion on the framebuilder’s list on how the virtual pivot point works on my frame fixture (and on the Arctos).  I took some more photos to try and explain how it all works.

Here are some photos showing how the parts fit together:

This is the seat tube angle adjustment backplate. The adjustment plate rides in the groove slot on some brass pins. There are some machining errors visible in this view, but they don't affect the precision.

This is the back of the adjustment plate. The groove in it is for the locking handle to pass through.

The adjustment plate is mounted on the backplate.

This video shows it all in action.

Click this photo to see a video that shows it all in action. Watch how the BB position doesn't change.

My new frame fixture

I started on this fixture a couple of months ago, then back burnered it.  A couple of weeks ago I started to get active again and this weekend I was able to put the finishing touches on it.  I’m really excited about how it’s come out. 

It is highly insipired by the Arctos Frame Jig that was designed by Gary Helfrich.  The details and implementation are different, but it is setup in the same way and I copied the basic overall shape and virtual BB pivot of the Arctos.  I always liked the idea of the Arctos Frame Jig because it was made of T-Slot extrusion (in my case I’m using 15-series 8020).  That makes the fixture a bit more modular (so that I can reconfigure it for different needs) and kept the largest pieces that I needed to machine relatively small.  It doesn’t make it easier or cheaper to make the fixture compared to other designs, there are still over a dozen custom cut parts on here which required high precision and 8020 extrusion is not cheap.

A key feature of this fixture is that every adjustment is locked independently.  My old fixture had many parameters locked with the same few bolts.  With the old one if I screwed up a miter and made a tube 1mm too short I’d spend 20 minutes rejiggering everything and getting it all aligned again.  On the new fixture I’d just need to unlock a couple of handles, slide one part to make the small adjustment, and lock them again. 

It was really important to me to have a fixture that makes it easy to install and remove the frame. This fixture makes it easy, you just raise the upper head tube and seat tube cones, release the dummy axle using the quick release, and remove the shaft collar that holds the bottom bracket in place. Many other designs have solid rods which run through the head tube and use many more clamps around frame tubing, but I didn’t want mess with all of that.

This new fixture is much easier to configure than my old one.  The basic measurements required are:

  • X and Y from the center of the bottom bracket to the bottom of the head tube (438mm Y, 451.7mm X in the drawing below)
  • Head tube angle
  • Seat tube angle
  • Bottom bracket drop
  • Chainstay length
  • Head tube length
  • Seat tube length

Here is a drawing for the next frame that I’m building which shows these dimensions (in red).  It also lists dimensions for mitering (in cyan).  That is basically everything that I need to make the frame.  This bike will be my new commuter, replacing my Novara Fusion.

The fixture will have scales which allow for direct reading of the first 4 items listed.  Currently there isn’t a permanent scale for the X offset, but I have a simple solution of clamping a ruler in place.  I did make direct reading scales for the head tube angle and seat tube angle, shown here:


The bottom bracket drop also is set from an easy to read scale.  The alignment of the bottom of the dummy axle with the scale shows you the bottom bracket drop (74mm in this example):

It isn’t obvious from photos, but a tricky part of the Arctos Jig (and this one) is that the BB position stays static as you adjust the seat tube angle.  The same is true for the bottom of the head tube.  The seat tube angle adjustment has a virtual pivot point around the bottom bracket despite not having anything connected to that pivot point.  That is done with two slots that are concentric around the bottom bracket.  I cut these on my baby sized CNC mill, this would be a much harder operation to do on a manual machine.  The HTA block has a real pivot which is aligned to be directly under the bottom of the head tube.


The rear triangle setup is pretty easy.  There is a rear triangle tower that has a quick release dummy axle holder that is centered with respect to the tube cones.  It can be slid back and forth by opening two handles, and then you can read the rear chainstay length using a ruler:

Arctos Jigs use solid aluminum for the standoffs to this rear tower.  I hate drilling really deep holes in solid aluminum, so I used 80/20 which already has a hollow cavity down the middle.  The end plates that I made keep the threaded shaft for the locking T-Nuts in place:

I used the bottom bracket post from my old jig, but I’ve always been proud of this design.  The key is using an adjustable locking shaft collar (about $30 from McMaster Carr).  That shaft collar gives me a fine adjustment for the offset so that I can handle 68mm to 73mm bottom brackets easily.  Removing the outer locking shaft collar frees up the frame.  The rod running through the bottom bracket is solid 5/8″ steel and is plenty beefy. 

I’ve already been asked if I’m going to make this fixture as a kit.  The simple answer is no for two good reasons:

  1. It isn’t my design.  I wouldn’t feel comfortable selling anything that was so heavily copied from an existing source.
  2. There are a lot of parts in this fixture that were done on my manual mill and which require a good precision.  I think that a realistic estimate would be 15-20 hours of labor per fixture.  I just don’t have that amount of free time and would rather use what I have to build frames, spend time with my family and friends, ride my bike, etc.

However I am helping Alistair Spence make one of these fixtures for his shop.  I’m excited about the possiblities of us both having compatible fixtures, it opens up options to make unusual hybrids for building tandems or cargo bikes somewhere down the line.

I’m writing this post while on limited sleep, so hopefully it makes at least a little sense.  If you have questions leave comments here, on my smugmug (permanent), or my flickr (free account, so photos will fall off over time).  There are more photos published in both locations than in this blog entry, and you can find high resolution versions of all photos there.

Disk Fork for my Porteur

As I mentioned in a recent blog post I’m building a new commuter frame and fork.  I’ll be moving all of the parts over from a Novara Fusion that I bought.  That includes the disk brakes.

I don’t like most disk brake rigid forks because they are either straight blades or have a really ugly bend to them.  I wanted to build something that looked a bit more traditional.  This presents an interesting design challenge though, since disk brakes are known to “unrake” forks with a tight bend.  My solution was to make some custom dropouts that extend far above the disk caliper into the more stout portion of the fork.  The dropouts had the match the bend on the fork blades.  I still consider this an experiment until I’ve put some hard riding on the fork.

I love the results!   It still isn’t as elegant as a nice flat crowned fork with a brazed on centerpull, but it doesn’t look half bad.

The brazeon count is a bit out of control.  There are eyelets near the bend for fender mounts, eyelets at the midfork and embedded into the crown for mounting a porteur rack, and a simple cable guide for keeping the brake cable out of the way. 

I did use a trick.  The brake is a “rear” disk brake because those are mounted inline with the dropout.  “Front” ISO disk brakes are offset by 4mm from the dropout, and that wouldn’t have allowed me to make one piece for both the dropout and the disk mount.  I wanted a single piece because it saved me from making a fixture for the disk brake mount or making a really complicated dropout.

NOTE: This trick doesn’t work. Read the comments for more details. I got away with it with a BB7 that is highly adjustable, but don’t think it will work with other disk brakes.

The dropout has Keith Anderson TITO stainless inserts brazed in.

Next up: finish up the new frame jig and build the frame.  A rack might come out around the same time.

Fork Fixtures are available

I spent a rainy Saturday finishing up 6 fork fixture kits.  The 5 prototypes that I made have been in use for about 6 months now and everyone who has reported back has been very happy with the kit.  The fork jig is designed to be fast to setup, accurate, and to provide a lot of brazing access.

For $90+$10 shipping you get this:

With the assembly instructions, around $100 in other parts, and an hour of time you can turn it into this:

 This is probably the only batch of kits that I’ll have available for a while, I want to make progress on some of my other projects. Email me (alex at phred dot org) if you’d like one and I’ll send you an invoice via PayPal.  Seattle residents can pick them up in person and save $10.

Sorry, I’m not shipping internationally right now.  I will start that back up in the spring.

A couple of kayak projects

I’ve been spending a lot of time in my kayak or thinking about paddling this year.  It isn’t a replacement for cycling, just another thing that I’m enjoying.

Earlier this summer I bought a used Valley Nordkapp kayak.  I’m really loving this boat (I like the one that I made in my class last spring too, but I like this one even more).  I’ve been taking classes and learning new skills and recently added a few nice toys to the boat recently to help with that.

When I’m practicing rolls and rescues it is nice to be able to get all of the water out of my boat quickly and easily.  In rough conditions it is even nicer to be able to empty the boat while being able to use my paddle for bracing.  I was going to put together my own electric bilge pump setup, but Blue Water Kayaks sells a kit that does the job nicely.  There is a battery pack and pump behind my seat:

The big blue box has the battery and electronics.  It is held to the bulkhead with some bungie cords.  Underneath there is a small 500 gallon per hour pump that can be run off of the battery.  It is glued to a piece of foam which is glued to the floor of my kayak.

The bilge pump sends the water out a hose which runs to the front of my kayak’s cockpit and out through a small port on the top of the kayak:

On the rear bungie line you can see a big black box.  That is a magnetic which turns the switch on and off for the pump.  Getting that switch right is the hard part about building your own electric bilge pump, and it is nice that Blue Water Kayaks does a good job for you.

I carry a second paddle on the front of my kayak.  That paddle can be used if my primary paddle breaks or is lost, or just if I want to use a different style of paddle.  My boat already had bungies for carrying the paddle there, but the end of the paddle was scratching up the boat.  Today I had some unexpected free time and made a holder that the ends of the paddle shaft can sit in, saving the surface of the kayak.

There is nothing special here, they are just tubes of heavy duty pack cloth with some webbing that ties them to the deck lines.  The only innovation that I can offer is the use of a ziptie (any stiff plastic would do) put into the front hem that will keep the tubes open at all times so that I can easily put the paddle away.  If you don’t want to make your own then just get the North Water Paddle Britches which do the same thing in a more stylish way.

Tomorrow I head out for a two day kayak camping trip in south Puget Sound and I look forward to trying out some of this new gear.

A New Bike and My Next Project

A couple of months ago I bought a 2009 Novara Fusion bikes on closeout from REI:

The REIs around Seattle had a small number of these for half of their original price.  The bike came with front and rear Alfine hubs, generator lighting, fenders, a rear rack (that I removed), a chainguard, and disk brakes.  Not bad for under $500!

There are some nice details.  This taillight is battery powered and turns on automatically turns on if the bike is moving and it is dark out.  Sadly it uses a non-standard N battery, otherwise it is nicer (in brightness and function) than the Planet Bike Fenderbot.

There is a cool bell that is built into the brake lever that I’ll have to take a photo of later.

The disk caliper is tucked away on the chainstay, out of the way of the seatstay and rack and fender mounting.  The dropout even has provisions for the included kickstand:

I did replace a few components.  The stock cranks were wide and not very nice, so I put on something better.  I also replaced the tires, pedals, handlebars, and grips.

My next project is to replace the fork and frame with ones that I build.  The Novara frame has a reasonable geometry and fits me alright, but I don’t like the very stiff aluminum.  The fork needs more rake if it is going to work well with a porteur rack.

Tubing arrived for the new frame this week.  I’m using Pacenti Slant Six lugs with True Temper Verus HT 8/5/8 oversized tubing.  The lugs will keep the sloping top tube of the Novara, a feature that I like because it makes it a bit easier to loan the bike to friends who are shorter than me.  I don’t like the chain tensioner that came with the Novara, so I’m going to switch to the Engin/Paragon Rocker dropouts which have chain tensioning built in:

I think I’ll make my own front dropout that incorporates the disk mount and which extends high up the fork blade.

I’ve also been riding my last project all summer, but haven’t posted a photo of it since having it powder coated.  I still don’t consider the bike done because I haven’t built the light weight rear wheel or had the stem and rack chromed.  I’ve still put over 1000 miles on the bike in this unfinished state, so I maybe I should call it finished.

I love this bike.  It is fast, light, handles well, and looks nice.

Hammock Camping Thoughts

Reminder: I also have a blog over at http://roughstuffnw.org that has occasional trip reports.  I posted one last weekend about riding the Mountain Loop Highway.

Hammock camping at the Suiattle River

I’ve been camping with my Hennessey Hammock for 10 years now.  I’ve used it snow, hard rain, and in warm summer conditions.  During that time I’ve spent more time fiddling with hammock gear than the rest of my camping gear combined. In the end I just bought the accessories that I should have gotten in the beginning: a good down underquilt and top quilt.  The underquilt is a down blanket which hangs underneath the hammock to provide insulation that doesn’t get compressed.  Without one the hammock is pretty chilly if temps are below 60F outside.  The quilt wraps up high around the hammock and is the warmest and most comfortable setup for the hammock.

I started to think about the real costs of the hammock with this gear and was a bit stunned at how expensive the setup really is.

Costs and weights for my hammock setup (weights are measured on my kitchen scale):

Item Cost Packed Weight
Hennessey Ultralight Asym Hammock $200 1100 grams (2.4lbs)
Jacks R Better Nest Underquilt (bottom insulation) $290 710 grams (1.6lbs)
Rab Quantum Top Bag (top quilt/sleeping bag) $103 (on closeout) 500 grams (1.1lbs)
Total $593 2310 grams (5.1lbs)


Costs and weights for a bivy setup:

Item Cost Packed Weight
Outdoor Research Alpine Bivy $239 930 grams (2lbs)
Thermarest Neoair Regular (bottom insulation) $150 400 grams (0.9lbs)
Rab Quantum 400 Sleeping Bag $140 (on closeout) 850 grams (1.9lbs)
Total $529 2180 grams (4.8lbs)


Both of these are lightweight setups suitable for one person camping down to around freezing.  The sleeping bag prices are based on current closeout Rab bags from http://www.departmentofgoods.com, non-closeout prices on comparable bags are easily double that.  The pad and sleeping bag used for the bivy setup are also ideal for tent camping (when sharing shelter with someone else), while the Hammock underquilt and top quilt are more special purpose items.  The bivy also works in more places, the tent limits me to camping with the trees.  Either setup just about fills a small Ortlieb pannier when packed.  There are cheaper and lighter bivy options, I have this one because I got a very good deal on it ($20 lightly used).  If I were buying a new one I’d look at the $90 REI Minimalist.

You can use a hammock with a sleeping pad and a normal sleeping bag, but it isn’t nearly as comfortable or lightweight.  I think that it is a good way to try out a hammock, but if you get into a hammock I’d expect to upgrade to at least a nice underquilt over time.  I don’t think I could recommend a hammock to someone on a budget, a lightweight tent or bivy is a more flexible setup to buy into.

Despite all of that I love my hammock.  If you can afford a good hammock setup I don’t think you’ll find a more comfortable night of sleep.

If you are into hammocks and are under 6′ tall get the Rab Quantum Top Bag while you can.  This is a sleeping bag with no insulation on the bottom.  I slit the bottom sheet in half and hemmed it (which took about 30 minutes) and ended up with a very nice top quilt for half the price of any other option.  A quilt is ideal for the Hennessey Hammocks because it is hard to zip up a sleeping bag from inside the hammock.