Gear Review: Ostrich Handlebar Bag and Velo Orange Decaleur

Introduction

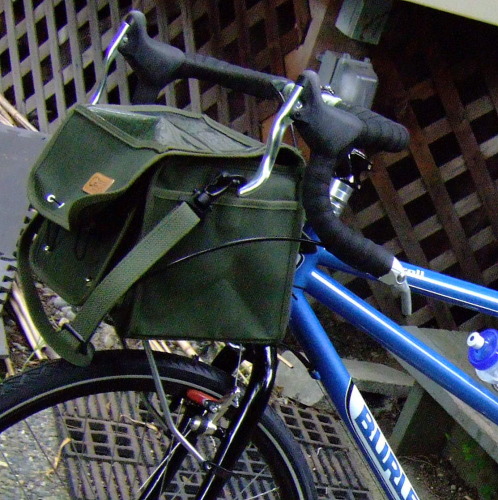
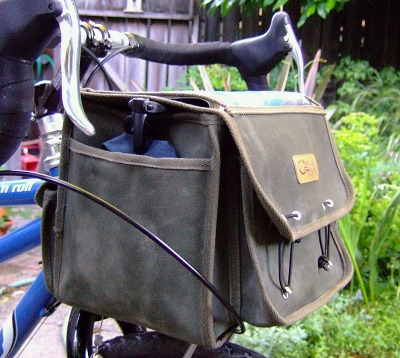
The Ostrich F104 is a French-style handlebar bag made of cotton duck. It is designed to mount to the handlebars, but have it’s weight supported from the bottom by a front rack. I’ve usedit with the Nitto Campee (sold by Rivendell as the Nitto Mini) and Nitto M12, but it would work with any front rack that has a top shelf. Normally the bag is secured to the handlebars with two leather straps, butVelo Orange makes a quick release device that will support the bag instead.


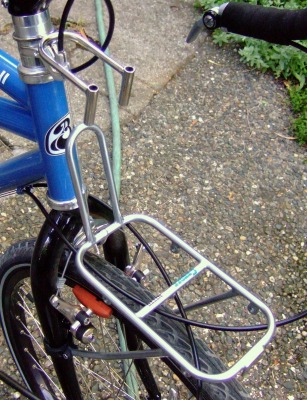
The front support rack and the bike-half of the Velo Orange Decaleur

This setup is quite different than most handlebar bags, but it has some big advantages. Most handlebar bags use a quick release clamp which mounts to the handlebars and which supports the entire load only from the bars. In comparison this bag is mounted lower on the front of the bike, which both improves handling and prevents the bag from blocking handlebar mounted accessories. The use of a front rack to support the load from the bottom allows for a heavier load than most bags can handle.

Bag Design and Use


The rear and side bag pockets

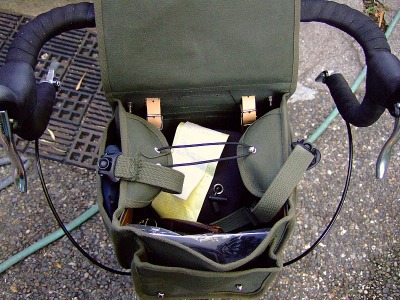
The handlebar bag is quite large with a capacity of almost 13 liters. It is almost a cube at 260mm (10 1/4″) wide, 220mm (8 2/3″) tall, and 200mm (8″) deep. There are 5 pockets in addition to the large main pocket. The front of the bag has a wide and tall pocket that is about an inch deep that is useful for keeping small but important items like your sunglasses. The rear of the bag has two small pockets. I found that my wallet and cell phone fit perfectly into one of them and carried a small digital camera in the other. There are two thin pockets on either side of the bag. I carry a home made rain cover in one and left the other empty. The front, rear, and main pockets all use elastic shock cord over a metal loop as a closure mechanism. This is secure and yet very easy to open with a single hand.

At the top of the bag there is a map pocket. The map pocket is completely open on each side (unlike my other handlebar bags) and has a 1cm grid on top which can be useful when making measurements on maps. I didn’t think I’d like the open sides and worried that my maps would shift or fly out while taking tight corners, but this has not been a problem. I don’t like the grid, in bright sunlight it projects grey lines onto the map which can look like roads. I often found myself removing the map from the case to read it while riding due to this issue.


Top flap opened

One concern on the BOB and Kogswell lists is that the main flap on this bag opens backwards. The closure is on the front of the bag (facing away from the rider) instead of the back of the bag. I can reach the closure while riding to open the bag,but it requires more of a reach than other handlebar bags that I’ve used. On the other hand the elastic shock cord is easier to work with than the zippers or snaps on my other handlebar bags,so this makes up for having to reach farther. Once opened there isn’t really a downside to having the bag open the wrong way. I don’t ride brevets or other timed events, so I usually accessed the bag while I was stopped anyway. If I did need to access the bag while riding I would probably keep food and other fast access items in the side and rear pockets.

As I mentioned earlier this is a very large handlebar bag. At 12 liters ithas the same volume as one of my Ortlieb small front panniers. On my first ride with this bag I was able to fit a box of cereal, a large bag of musliex, a full change of clothes, my tools, and a bicycle lock. I do not have a problem carrying my normal commute load (change of clothes, maybe lunch, and tools) and usually have space left over (unfortunately it will not fit my laptop). While touring I could carry a many day food supply in it in addition to my wallet, phone, camera, sunglasses, passport, and book.

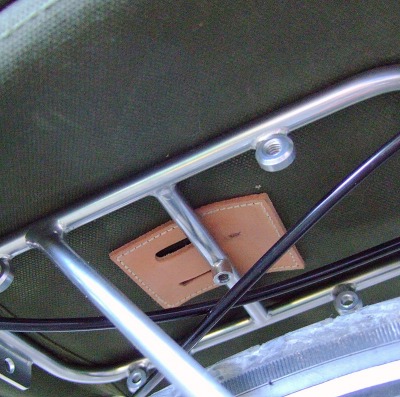
I used the handlebar bag exclusively with the Velo Orange Decaleur, but it came with straps for securing the bag directly to the handlebars and the top of the rack. The handlebar straps would only be useful if your rack to handlebar height matched that of this bag. I didn’t find the under the bag strap to be useful at all, it was turned the wrong way to work with my Nitto front racks and hard to reach to secure it anyway. I think it would be more useful if turned 90 degrees and located at the front edge of the bag instead of in the center.


The loop under the bag is not well located and is oriented the wrong way to be useful

Stylistically I like the design of the bag. It has leather only where it provides function and is otherwise made of cotton duck. There are internal stiffener plates for the sides and bottom to maintain the bags shape, but they can easily be removed for packing.

Decaleur Use

The decaleur is an optional item, but should be purchased with this bag. It makes installing and removing the bag trivial. Instead of strapping it to your handlebars you just lower the bag onto the decaleur and front rack.

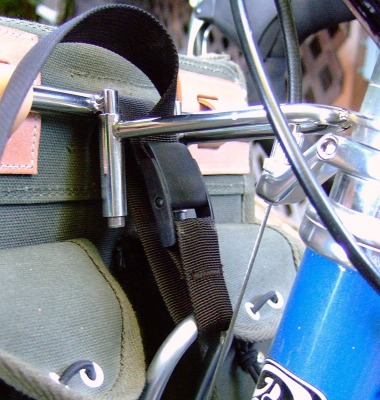
The decaleur consists of two parts, both made of stainless steel. The first part fits into your headset stack and consists of a U shaped piece of metal with two downward facing tubes. The second part mounts to the bag and has two prongs which face downwards and fit into the tubes on the bike portion of the decaleur. Each part is available seperately, so you can buy one of the bike parts for each bike that you own and one of the bag parts for each of your handlebar bags if you want to move things around easily. You do need to mount the decaleur at roughly the same height (within a cm or so) above the front rack on each of your bikes. These photos show the decaleur mounted on a bike with a 1 1/8″ threadless headset, but they also make the bike portion for 1″ threaded headsets.

For road riding the decaleur by itself is all that you need to secure the bag to the bike. Just align the bike and bag portions of the decaleur and drop the bag onto the rack. When you need to remove it (to go shopping for instance) you just lift the whole thing off of the rack and go on your way. It couldn’t get much easier. Over large bumps the bagmight bounce a little bit, but never high enough to clear the decaleur.

While touring on logging roads I found that it wasn’t quite secure enough. I hit a pothole while descending and the bag bounced off of the front rack and out of the decaleur. I found that a velcro strap between each part of the decaleur was enough to keep this from happening, but it made installing the bag take longer. It would be nice to see the decaleur redesigned to have a positive locking mechanism. An easy running change would be to use longer prongs on the bag part of the decaleur with a hole drilled across the bottom of them. A small pin or spring clipcould be installed the lock the bag to the bike. Hopefully Velo Orange considers doing this in a future production run.


Securing the Decaleur with a compression or velcro strap

Compared to a front basket

I’ve been using a Wald basket on the front of my bike prior to getting the Ostrich bag. A couple of cyclists have asked me how they compare.

I think I’ll keep using both. The basket is ideal for bulky or oddly shaped loads such as groceries, large boxes, and bicycle tires. The basket does not carry small items such as keys or even gloves very well because they can fall through the open bottom. The handlebar bag is much more useful for carrying gear, but not as useful for riding.

The ideal solution would be a basket which worked with the decaleur. This would make it easy to use the handlebar bag for touring and longer rides and switch to a basket for shopping or packages which are too large to fit into the handlebar bag. I may modify my Wald basket to work with this system.

How I tested and limitations in my testing

I’m writing this review in late June after having owned this bag for about two weeks. In that time I’ve used it for about 75 miles of commuting as my only on-bike storage and for about 150 miles of loaded touring while also carryingfour panniers.

While commuting I typically put stuff that I needed to reach (keys, my bus pass, maybe a book or MP3 player for the bus ride) in outside pockets and used the main pocket for a change of clothes, breakfast or lunch. I carried tools in the flat side pockets. While touring I used the rear pockets to hold my phone, camera, and wallet, the front pocket to hold my sunglasses, a side pocket for a rain cover, and the main pocket for food, a book, and a long sleeved shirt. I’ve ridden with the bag carrying loads of almost no weight up to about 6.5kg (15 pounds).

I did not encounter any rain during the review period, so I can’t comment on how this bag would fair in poor weather.I did make a simple raincover for it (and I understand that Velo Orange will offer one soon) in case of rain. I don’t think that the bag would hold up to heavy rain very well without a rain cover. The cotton duck doesn’t seem to be waxed, the cover does not protect the sides of the bag at all, and the map case is completely open on the sides.

Conclusion

The Ostrich F104, Velo Orange Decaleur, and a front rack of your choice provide a great way to carry a light to moderately heavy load up front. They provide an accessible load with plenty of capacity (both in weight and volume) which is easy to install and remove from the bike. I expect to use this system, or something very similar to it, for a long time to come.

The bag could use a few minor tweaks. The bottom strap is not well placed (at least for my Nitto front racks) and is thus useless. It would probably be nicer if the lid opened in the other direction, but this is not critical. The map case should not have any gridlines. It would be nice if bag was designed for greater weather resistance.All of these concerns are fairly minor and should not prevent one from buying it.

The decaleur does what it was intended to do extremely well. I’d like to see a built in method of locking the bag to the bike, but there are suitable workarounds and securing the bag this way is only necessary on the roughest roads.

There is not much competition out there for bags which use this mounting system or provide this capacity and the Ostrich bag and Velo Orange decaleur are both very well priced compared to what else is out there. If you are considering a front handlebar bag in this style it is hard to go wrong with this solution.

You can buy the decaleur today at Velo Orangeand they should be getting the bags in soon. I also have larger and more photosof this bag on the bike photo section of my website.
Our new tandem


click for more photos

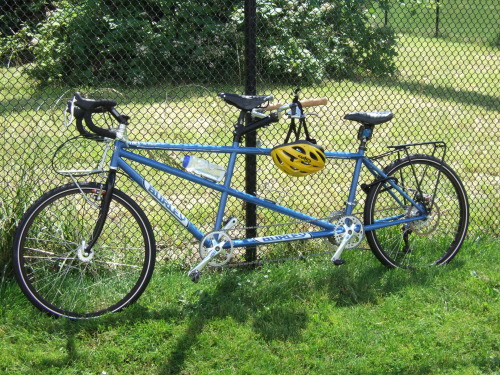
About three months ago I made a deal with a bike shop owning friend to trade in our RANS Screamer recumbent tandem for an upright Burley tandem. I really liked the Screamer for long rides, but I wasn’t as comfortable riding it on shorter rides in the city. Almost all of our rides are shorter rides in the city, so the Screamer didn’t make a lot of sense. As a bonus the new owner of the Screamer is also my regular touring buddy and so if I ever want to use the Screamer for touring again it won’t be far away.

I originally thought I’d get a Burley Duet which is a very nice steel road tandem. The problem with the Duet is that it doesn’t take wheels with tires over about 35mm wide (or even skinnier with fenders). Fenders are must for me and I like to find dirt trails, so wider tires were also necessary. We decided on getting the Rock and Roll which is their nicer “mountain” tandem and converting it to drop bars. This is exactly what we did with our first tandem, a Cannondale MT1000.

The Burley Rock and Roll comes stock in black or yellow, neither of which was very exciting for us. We decided to upgrade to a stock color and after a bunch of looking ended up going with “Celestial Blue”. This is a nice medium blue with a hint of sparkle in the paint.

The tandem was ordered and scheduled to arrive in about 6 weeks (the long delay was due to the custom paint). 6 weeks came and went and I finally got a call late last week saying that the tandem had arrived. On Sunday I headed down to Olympia to pick it up (and play some bike polo). During the evenings this week I swapped out parts and built it up.

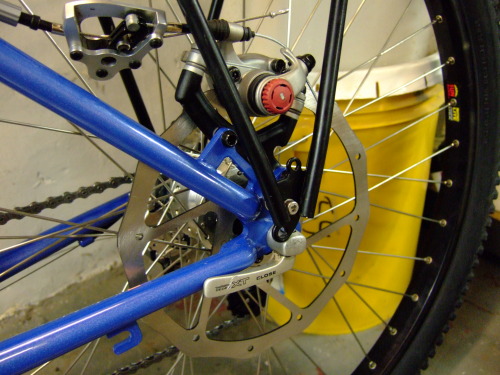
There were a few build challenges, but the bike has come together nicely. Stock the tandem came with a rear disk brake. This has caused a few issues: the disk brake caliper is setup for mountain bike brake levers and it sits right in the way of a rear rack. I solved the rear rack problem by drilling a new mounting hole in our rack that lets it sit a little lower. This opens up the space a bit where the disk brake caliper sits, and gives it just enough room to fit. The only downside is that it doesn’t leave enough space for our Burley trailer hitch.

I temporarily made the disk brake caliper compatible with drop bar levers by using a Sidetrak BPB. That is the device sitting right in front of the disk caliper. It is a simple lever that turns a small amount of cable pull into a large amount of cable pull. The BPB does the job but is ugly and cumbersome, so I have a new disk brake caliper on order that is designed to work with drop bar levers.

Everything else on the bike went together smoothly. I mounted a Nitto Mini front rack for holding a handlebar bag and that works great. I was hoping to be able to use a Nitto M12 front rack because that model mounts to the cantilever studs, but it didn’t fit on this fork. The Nitto Mini uses clamps that are a little ugly, but the black clamps disappear into the black fork and the final result looks good.

We took the bike on it’s inaugural ride yesterday down to the U District Farmer’s Market and the Fremont Solstice Parade. The bike rides great and will meet our needs wonderfully.

Parts list for the other bike geeks out there:

  • Wheels – Shimano HF08 (XT) tandem hubs, Sun Rhyno Lite rims,Schwable Marathon 26×1.5″ tires
  • Captain’s handlebars – Nitto Noodle 46cm,Dimension high rise 120mm stem, Tektro brake levers, Shimano Dura/Ace 9sp barend shifters
  • Stoker’s handlebars – Nitto Dove, Rivendell cork grips, Burley stoker stem, and unused brake/shift levers (we’re borrowing this setup from Christine’s single bike to see how the setup works on the tandem).
  • Captain’s seatpost and saddle – Ritchey Logic 29.8mm and Brooks B17
  • Stoker’s seatpost and saddle – Thudbuster ST. The saddle is a work in progress.
  • Drivetrain – Shimano 9sp front derailleur (whatever came with the bike), XT rear derailleur
  • Cranks – Thorn tandem cranks, 170mm front, 165mm rear, 50/38/24 chainrings, 42 timing rings
  • Front rack – Nitto Mini
  • Rear rack – Tubus Vega
  • Front brake – Suntour XC Pro
  • Rear brake – Avid BB7 Mtn with Sidetrak BPB, 203mm disk

alex

Shi Shi Beach hiking trip

Two weekends ago I went on a 3 day road and backpacking trip with my friend David. I’ve known him longer than anyone who isn’t a family member and we’ve been great friends for almost all of that time. He had some time off and we decided to do a trip together on the Olympic Peninsula. We try to do something like this every few years.

The weather was looking super iffy on the morning of June2nd and we spent most of it looking at weather reports and wondering if we shouldhead east (away from rain) instead of going west (into it). Finally we gave in and decided toignore the weather reports and head west. Like many great trips wekicked it off with a large meal and hit an Ethopian Resturant on the way out of town. During lunch the rain slowed down and things started to look better.

We had good ferry Karma and arrived at the Edmonds/Kingston ferry with no wait time for a ferry plus getting loaded onto one of thefirst lanes to be unloaded. The drive to Port Angeles was uneventful except forme making a wrongturn where we drove a 40 minute loop around the Port Gamble Indian Reservation (and yes, there is a casino in Port Gamble) beforepopping out exactly where we started and getting back on track.

In Port Angeles we arrived at the ranger station 2 minutes too late to get a bear canister, but the ranger told us we wouldn’t need one for our first night, andwe figured we wouldn’t have any food left by the second night.As the day turned into evening we realized that we had no flashlight and found aopen hardwarestore to buy one, then headed up into the park to go to Olympic Hot Springs.


Passing Lake Mills on the way to the Hot Springs

The trail into the Hot Springs was an old road so the hiking was super easy. We saw a few other groups coming out of the hot springs and an abandoned biking bottom of the side of the trail, but not much else on the hike in. We went to the campground first and setup our stuff, then went down and found the pools themselves.

The hotsprings were okay, but not great. They have higher algae growth than most springs that I’ve been too, and someone seems to think that using old car floor matts is an appropriate way to seal up the pools. I found it kind of disgusting, but I’ve also been spoiled by the wonderful hotsprings along highway 12 in the Idaho panhandle. David loves the springs and spent more time in them. We had some great conversations about how to best design a house that he is building and what the world will be like after peak oil.

While the hotsprings were lackluster the campground was great. It was mostly empty (only one other group was there), had bear wires for storing food, and the campsites were set pretty far apart and were flat. The only other people camping there were a little strange and very drunk and disappeared (while leaving their fire going) shortly after we got there. We shared a couple of beers and a little food and went to bed.

The next morning we headed out an on the road to Neah Bay to find Shi Shi beach.

Getting to Shi Shi beach is an adventure. It is a roughly 4 hour drive plus ferry ride from Seattle. In the last two hours of the drive (from Port Angeles) you’ll only pass through two communities before Neah Bay and both are very small with limited services. The scenery is nice though,and that is what really matters.

Once at Neah Bay you need to jump through a few hoops to get to Shi Shi beach. You need to pick up a Recreation Pass ($10) at one of a number of businesses in town. This pays for the trail to the beach. If you are with David you also need to find some fish for dinner. We asked around before finally being pointed to the fish processing dock and David walked down and was able to buy a full salmon,right off of the boat, for $5. $5, for a ~5lb fish. $1/lb for stuff that costs $20/lb back in Seattle. The day was looking up.

We arrived at the trailhead to discover a couple of rangers and a police officer looking at two trashed cars. They told us to park at the private parking lots (someone’s front lawn) a 1/2 mile back up the road. This cost another $10, but that is part of the Shi Shi adventure. You need to pay three people to get there — an Olympic National Park backcountry pass, the Makah Indian Reservation for trail work, and a private individual for parking so that your car isn’t broken into. Did we really want to go here that badly?

We did.


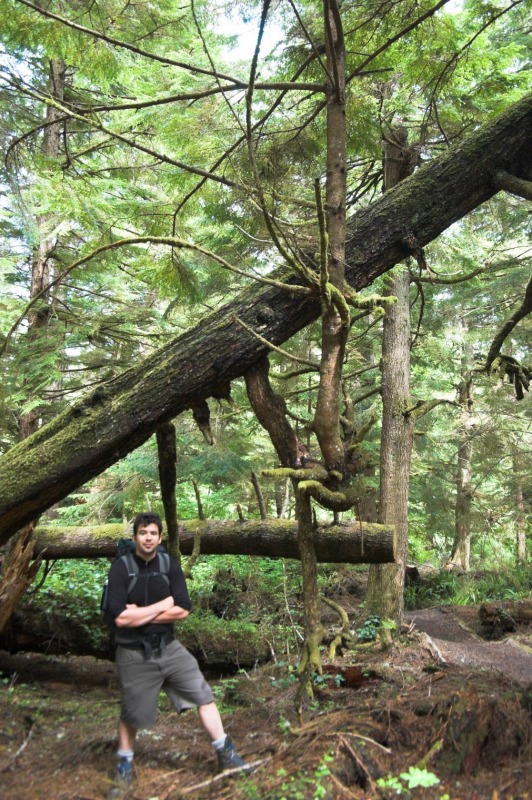
A cool tree along the Shi Shi beach trail

We loaded up our stuff and headed in. Since we didn’t have a bear canister we only brought food for that night and thought we’d find a nice breakfast in the morning elsewhere. The trail in started pretty nicely, it was mostly boardwalk and turnpike along some second and third growth forest. After about a mile it turned into a trek through the mud in second growth forest. The only people that we saw on the trail were a couple of rangers who passed us (going into the beach) and a odd woman walking very fast away from the beach who asked us if the wild raspberries were poisionous.

At the end of the trail we found a steep bluff down to the beach and the rangers were talking to a large group about their camping situation. We passed through and broke out of the woods onto the beach.


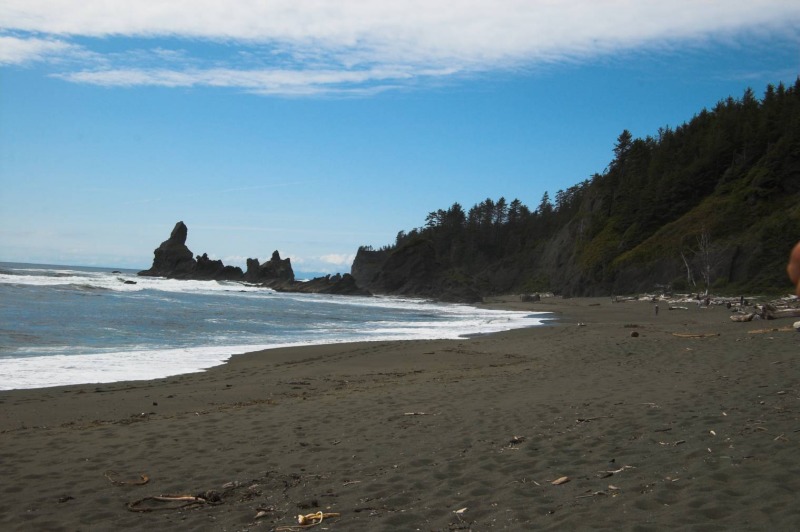
Shi Shi Beach, looking North

What a beach. There are large sea stacks at the points on either end of the beach. The beach is about 2 miles long and has streams coming across it in about 4 places. The stacks at the south of the of beach are called the Point of Arches and there are 3 arches that you can see through as you approach them.

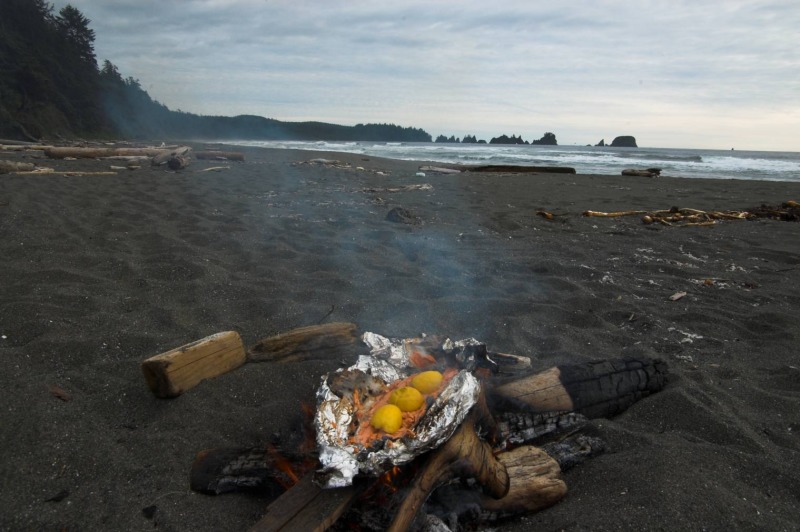
We walked about half a mile down the beach, setup camp, and had some dinner. The fish was awesome:


Grilling salmon in the fire

I’ve only recently started eating fish (after 15 years of being a strict lacto-ovo vegetarian) and this was the best that I’ve had so far. I expect that the setting, being hungry,and the freshness had a lot to do with that.

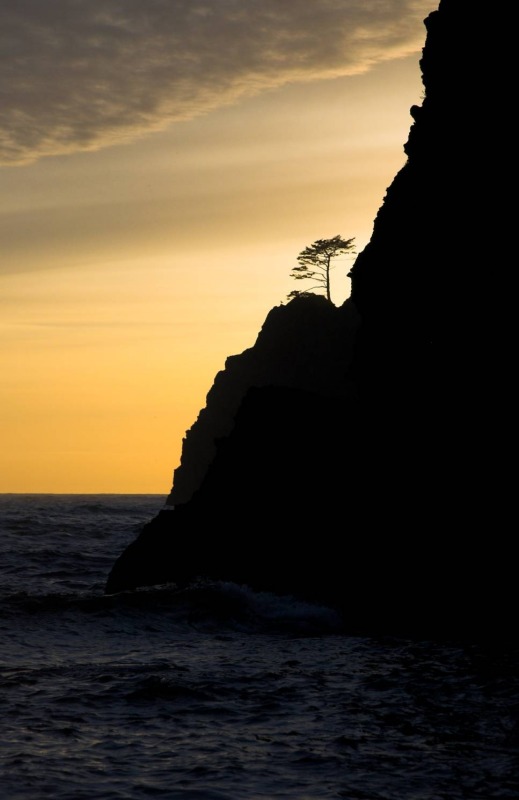
After eating about 2lbs of salmon and an ear of corn each we walked down to the end of the beach and back. The area around the Point of Arches was the most interesting and we waited there for sunset:


Sunset over the Point of Arches

Any thoughts of skipping this trip due to rain were clearly unfounded. The weather was wonderful and this might have been one of my more memorable sunsets (especially in Washington State). On the walk back up the sunset just got better and better.


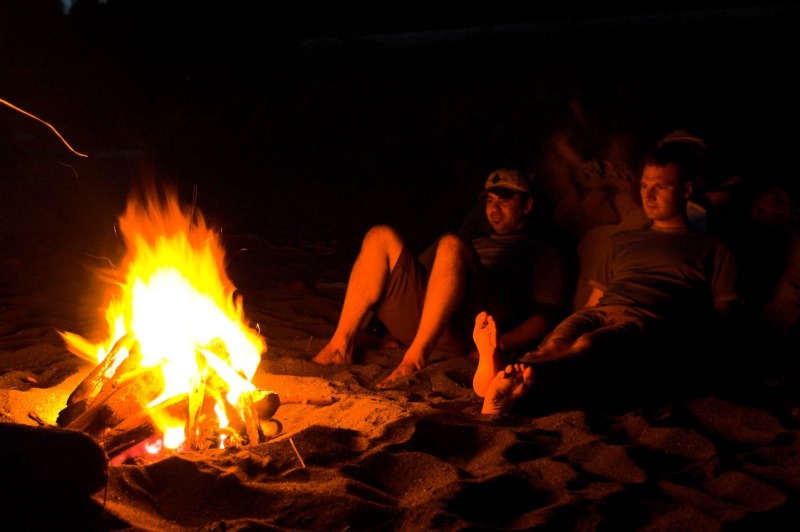
We got back to our camp at dusk, restarted our fire, moved it a little bit closer to our sitting rock, and sat back and relaxed. What a wonderful weekend. I hope to make it back another time.


Relaxing by the fire

The rest of the photos.

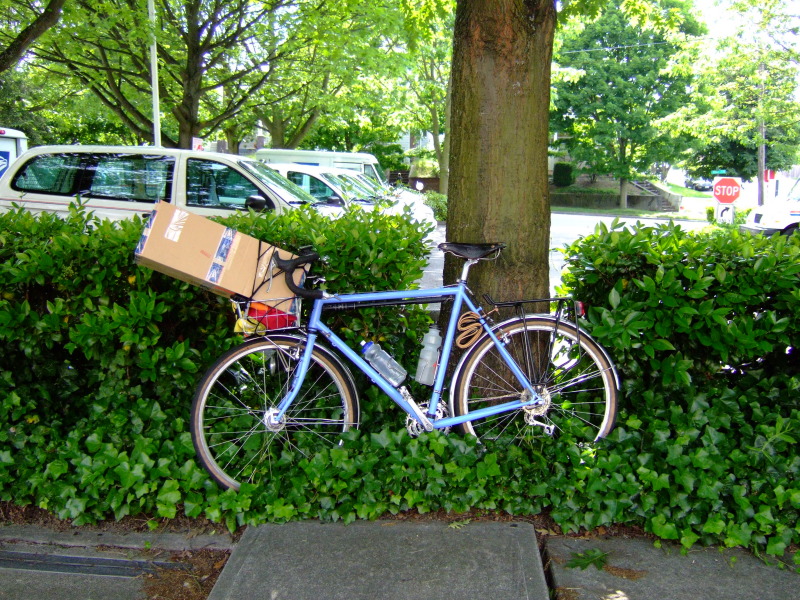
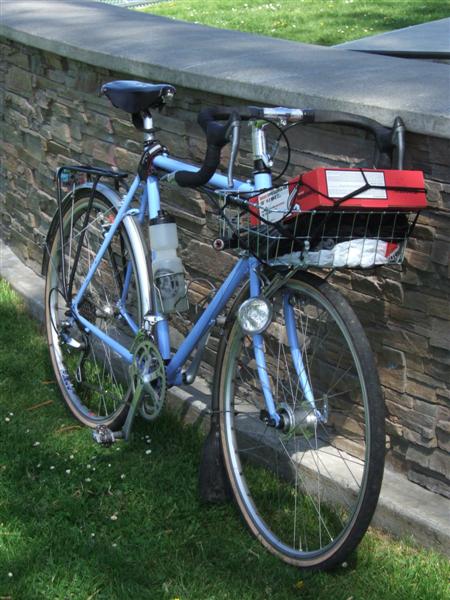
Big box, small basket

If Keith Gilstrap is reading this, that box contains your moustache bars.

Baskets are great. I would have needed my trailer to carry this if I didn’t have the front basket. I could have strapped it down to the rear rack, but I woudn’t have been able to see it and make sure that it wasn’t falling off.

The large box was just secured with a cargo net.

Seattle Ride of Silence

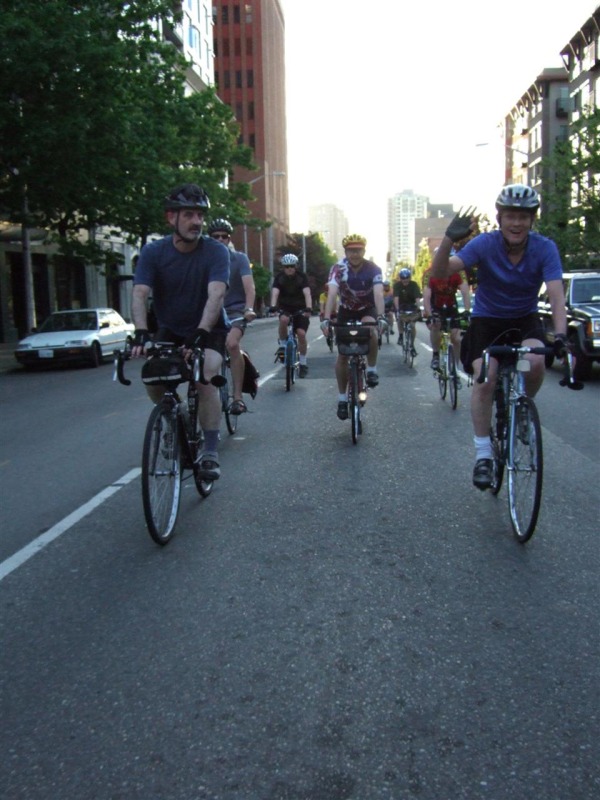
The Ride of Silence is a nationwide bicycle ride to mourn those that we know who have been injured or have died in bicycle accidents on the public roads. I joined about 500 (my guess) other cyclists for this ride in Seattle.

The ride had a lot of publicity here. There was a great article about it in the Seattle Times which highlighted a serious accident that Gypsie Goss (one of the owners of Aaron’s Bike Repair) had at the start of 2006.

As I rode down to the start of the ride at Gas Works park I came acrossdozens of other cyclists who were going to the Ride of Silence. Once there I found a lot of my normal cycling buddies from the BOB list and SIR. We formed a small group near the front of the ride.

I don’t have a good estimate of how many people were there, but the crowd was huge. We filled much of the Gasworks parking lot and the group spread down into the park itself. There were interesting bikes everywhere, from the Chair Bike that Aaron, Gypsie, and Braxton rode, lots of XtraCycles and tandems, some interesting homebuilt recumbents, dozens of fixed gear bikes, and lots of road bikes. Itwas probably the most inclusive bike ride that I’ve been to in Seattle just judging by the crowd who showed up.

Theplanned route went over the Fremont Bridge, skirted the side of Queen Anne, down 15th Ave to downtown, looped through downtown,up Eastlake,through the U District, and finally went back to Gas Works park.

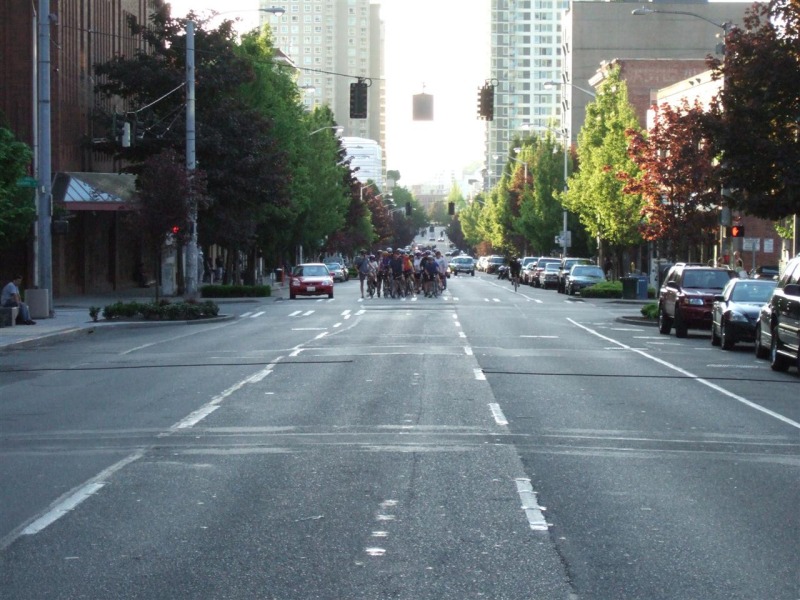
A few minutes past 7pm we headed out on the ride. At the first traffic light one of my major concerns was relieved. I was worried that cyclists on the ride would place more importance in staying together as a group then in traffic signals, but they didn’t. At Stone Way the light turned red and our group was divided. We kept going and caught up. This pattern was repeated throughout the ride, at times I was riding in a group with 20 people and at other times I was with a group of hundreds of cyclists. I loved looking backwards after one red light and seeing this view:

How often do you get to see a traffic lane jam packed with cyclists as far as the eye can see?

Having the group break up probably made a much larger time impact for observers. There was apparently a 30 minute steady stream of cyclists passing through a single point downtown. If we had held together this might have only been a 10 minute long group and less people might have seen us.

The cyclists on the ride did stick to the “silence” part of the name more than I expected. There was a little whispering here and there, but for the most part everyone was silent. The problem with this is that observers were always asking what we were doing, where we came from, and where we were going. No one would answer and I think this probably confused bystanders instead of forwarding our cause. Next year I hope to print up some business card sized flyers that I can hand out, and maybe others will do the same.

After the ride a few of us went over to Hale’s Ales for dinner and a beer and had a nice time hanging out.

Overall I think the ride was a moderate success. The biggest issue is informing the public on why we are doing the ride.

More photos

alex

Kitchen update after two weeks

It’s been two full weeks since the contractors first started on our kitchen. They’ve made a lot of progress:

I’ve been taking photos as every major part is done. Each of the links above links to the photos for that portion.

On Wednesday we stopped construction due to a problem with the cabinets. The cabinet boxes that arrived are made of particle board instead of the plywood that we ordered. It is going to take the cabinet company about two weeks to make the new cabinet boxes. Luckily the doors, drawers and hardwareare identical, so they can be moved from our old boxes to the new ones. In the meantime we’ll have a lot of time to repaint the kitchen.

alex

Kitchen remodel starts

I’ve had a super busy weekend taking the old kitchen apart. Our contractors are showing up tomorrow to start on a new one.

Why are we remodelling our kitchen? A lot of our friends ask us this because the old kitchen looked quite nice. Here is a photo:

The old kitchen looked great, but had a lot of shortcomings. The biggest one is that most of the useful storage is up high and hard to reach (even for me at 5′11″, even harder for Christine at 5′1″). There is a dead chimney running up one corner of it which wastes a lot of space and by removing it we can fit a large cabinet for the microwave and dishes. The cabinets in our kitchen were built by the previous homeowner and were well made, but not always well thought out. The silverware drawers were only about 2.5″ high and we couldn’t fit a full stack of forks. The tops of the cabinets were all at different heights which looked kind of strange. The area for the refrigerator was smaller than normal and limited our choices.

Here is what our kitchen looks like right now:

Removing the cabinets wasn’t too bad. I was happy to find someone (a member of my homebrew club) who was interested in all of the cabinets and he helped me remove them. I’m glad to see that they didn’t end up in a landfill.

I spent the rest of yesterday and most of today redoing the kitchen electrical. The original electrical had some serious code violations (the worst was a 50A 240V circuit breaker being split and feeding the outlets and lights over 15A wires). I used the 50A breaker to run a new subpanel and moved all of the kitchen related electrical to the subpanel. It is much cleaner and will allow the contractors to turn off the subpanel for wiring in new circuits without having to turn off the rest of the house power. This is a photo of the subpanel:

There are tons of other photos athttp://blogs.phred.org/photos/house/category1023.aspx. The kitchen will probably be the biggest thing going on in my life over the next month, so I’m sure that I’ll have more blog entries about it and will be updating the photos page too.

alex

A great week of riding

I injured my right knee last October and haven’t spent much time on the bike since. I’ve been slowly building up my miles in the last 3 months to get back to my normal levels.

This week I finally had a pretty normal week mileage wise for myself. On Saturday I did a few errands and took a ride on the tandem with my wife and put about 12 miles on the bike. On Tuesday the weather was perfect and two coworkers convinced me to ride home, so we took the Burke Gilman for another 25 miles. Thursday I biked home on my dirt road route with iBOB John Speare for another 13 miles or so. Today three of us rode home over I90 (22 miles) on a perfect sunny 70 degree Friday afternoon.

Tomorrow I’m going on a ride with John and my friend Larry and expect that this will put me at over 100 miles for the week. Yay!

Spring weather and good knees are wonderful things. I hope all of the other cyclists are getting out there too.

alex

baskets and bicycles

Let’s be clear from the start. This is at once the dorkiest looking and one of the most useful things that I’ve done to one of my bikes.

Joseph Broach wrote a nice blog entry a couple of months back about baskets. Then he posted even nicer photos of his Romulus setup with a front basket.

I’ve been riding one of the Kogswell Porteur prototypes for a few months. This is a unique production bike on the US market because it has a steering geometry which is designed for carrying big loads up front. I’ve been planning on making a large handlebar bag for it, but haven’t actually done that, so I’ve been carrying all of my cargo in the rear. Then I saw Joseph’s bike and ordered one of the Wald baskets.

(click here for more of my Kogswell Porteur photos)

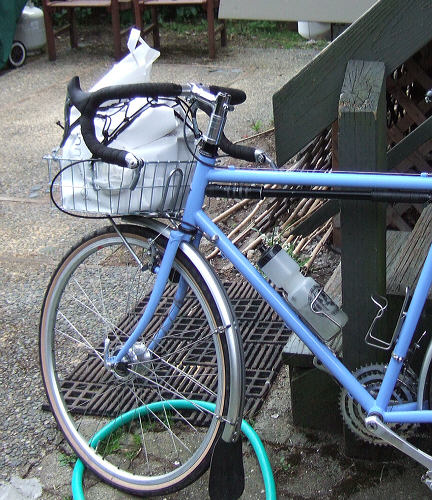
The basket is the Wald rear basket that Rivendell sells installed onto a Nitto M12 front rack. The basket is held in place with hose clamps. The handlebars are 44cm wide and this setup wouldn’t work with any narrower handlebars because the basket would intefere with the hand positions on the drops. The net is also sold by Rivendell and is essential or my stuff would blow away.

It is the perfect size for a full bag of groceries and stable enough for this too. I still carry most of my gear in the pannier on the back of my bike, but the basket makes it possible to pick up groceries or other shopping on the way home. It has also been fantastic for quick rides, just throw my lock and a jacket into the basket and head out.

In the two weeks since installing it I’ve used the basket almost every day. It has carried groceries, bicycle tires, plumbing parts from the hardware store, my bicycle lock, my jacket, and other random stuff.It is much faster to put a grocery bag onto the basket then to make groceries fit in the tapered shape of most panniers. It is nice being able to watch the load to make sure that everything is in good shape. It is handy to be able to reach into the grocery bag for a piece of fruit while riding. The basket is a great way to carry small grocery loads.

My plans for making a handlebar bag have changed. Rather than making a huge handlebar bag I’m going to make a small one which fits into the center of the basket. This way I can still use the basket’s extra capacity while touring. The basket is more useful than a handlebar bag for me when riding around town.

When you aren’t using the basket it doesn’t really hurt to ride with it. The basket and little front rack don’t weight very much and don’t get in the way. These photos were taken after a 25 mile ride where the basket was empty for 22 miles. I stopped and picked up groceries at a store near the end of the ride.

I can’t recommend putting a basket on every single bike that you own, but I can recommend putting a basket onto one of your bikes. The Kogswell Porteur is a great choice because it was designed for front loads, but most touring and city bikes would also work well with this setup.

alex

Footnote: For those who are curious,the basket works fine with the Sportworks bike racks found on many city busses. The hook fits over the front tire,under the basket. I would recommend removing items from the basket before putting your bike on the bus rack.

Why I don't like long reach calipers

There has been a lot of excitement on the BOB, Kogswell, and Rivendell lists recently about the new (but not yet available) Tektro 556 long reach dual pivot brake. This is a pretty cool brake with a reach of 55-73mm, a good 16mm more reach than the now common 47-57mm reach dual pivots. Longer reach allows for fenders and bigger tires.

Here is a nice drawing of the brake from Kogswell:

The red line shows a fender and the purple shows a 38mm tire. Kogswell is so excited about this new brake that they plan on building all of their future frames around it. I’m not that excited. Here’s why.

Long reach caliper brakes — design problems

Long reach caliper brakes have much longer arms than the 39-49mm and 47-57mm reach brakes that we’re all used to. The longer arms either need to be thicker (and thus heavier) or they are more flexible. You might think “Alex, whats the deal, the brake is only 16mm longer”. True, it is only 16mm longer, but the arm length increases by more than 16mm. The width of the brake must be increased to keep the same mechanical advantage (and to fit around wider tires and fenders). If only the brake reach was increased then the mechanical advantage of the brake would drop. You can see that the whole brake is scaled up if you compare a 39-49mm and 47-57mm Shimano dual pivot.

How much longer does the arm get when you increase brake reach by 16mm? I didn’t know before writing this post, so I measured. I have some Shimano 47-57mm reach dual pivots and some Diacompe FS-E 57-73mm reach dual pivots. I measured the length of the arm holding the left pad from the pivot point to the bottom of the pad slot. On the Shimano brake it measured 117mm. On the Diacompe it measured 157mm. So 16mm of reach cost us 40mm in arm length between these two particular models. That is 40mm of extra arm that can flex.

The longer pad slots of over 57mm reach brakes also cause problems. The section of the arm where the pad is located has to be constant thickness and the thickness is determined by the design of standard threaded pads, not the brake. There will be considerably more flex at the bottom of the slot than at the top. You can easily see the difference in this photo:

Note how long the thin pad-mounting area of the black brake 73mm reach brake is compared to the silver 57mm reach brake.

Cantilevers

Okay, we’ve discussed why I’m not crazy about super long reach brakes. Why is there a demand for them? It is because many cyclists don’t like the most common alternative, cantilever brakes.

There are a couple of reasons that people state for disliking cantilevers:

  • Complicated setup
  • Squeal
  • Asthetics
  • Fork design

Cantilevers do have a complicated setup,especially the designs from the early 90s that most people are familiar with. The pad setup is complicated because most deisgns use a single fixing bolt adjusts five different variables — pad height,rotation around the pad, toe in, distance from the brake to the rim, and angle compared to the rim. If you want to adjust one of these you end up adjusting all five. Modern cantilevers use threaded pads which reduce this to four variables (distance is fixed)and just eliminating that one variables makes setup a lot easier. Some good brakes (such as the Avid Tri-Align) from the mid 90s had nice designs that used multiple bolts per pad and reduced the number of variables to two or three per bolt.

Pad setup isn’t the only complicated factor about cantilever setup. Cantilever brakes use a straddle cable and the straddle cable height changes the mechanical advantage (power) of the brake. This is both complicated (because you need to understand the relationship) and very flexible, because you can tailor the brake to your exact needs. Most people don’t care about this flexibility and are happy with the one mechanical advantage given to them by dual pivot calipers. Modern cantilevers typically use a “link cable” instead of the straddle cable. This fixes the height of the straddle cable and eliminates this complication while giving you a similar mechanical advantage to a dual pivot brake. You can learn more about cantilever geometry on Sheldon Brown’s The Geometry of Cantilever Brakes article.

The complicated setup of cantilevers results in squeal on a lot of bicycles. It is easy to get the brakes working well enough, except for squeal. Cantilever brakes (especially inexpensive ones) typically have more play in them than caliper brakes and will squeal. Cheap calipers (like the Diacompe FS-E described above) also have lots of play and will often squeal too. For the last 25 years there have been many more cheap cantilevers produced than cheap caliper brakes (due to the mountain bike boom), so most people associate squeal with cantilevers.

It takes time to learn how to setup cantilevers, but with quality brakes you can rid of squeal and easily get a good setup. It doesn’t necessarily take a lot of money to get quality brakes. The Shimano cantilevers on my Rivendell Quickbeam retail for about $20 for a bikes worth and don’t squeal. They use a link cable so straddle cable setup is easy. They do have the old pad design, so pad setup is still tricky.

Matthew from Kogswell isn’t a fan of cantilever brakes because it gives him less flexibility in fork design. With caliper brakes the load is all in the fork crown, so running thin fork blades is not a concern. With cantilever brakes he needs thicker blades (at least down to the cantilever studs) which can resist the forces from the brakes. He thinks that he can design more comfortable forks if he uses thinner blades, but he can’t use thin enough blades with cantilevers.

I agree that this can be a concern, but I think that it is a minor one. Almost all of the flexibility in a fork takes place at the bottom of the steerer, not in the fork blades. Some engineers say that the fork blades don’t bend at all. I don’t know if that is true, but I can say that my bikes built for cantilever brakes don’t feel stiffer in the forks than the ones built for caliper brakes.

This brings us to asthetics. Some people find cantilever brakes to be ugly. As functional bike parts I don’t really find them to be any uglier than a crank, pedals, or rear derailleur. All are essential parts of the bicycle and fit a specific and useful roll. I don’t find caliper brakes to be more pleasing to look at.

Okay, so now we’ve talked about why people don’t like cantilever brakes. Why do I prefer them?

Cantilevers have much better clearance than any caliper. Cantilevers can clear tires up to about 2.5″ in diameter, including fenders. I like having the option of running wider tires on my bikes, even if I don’t always need to, and would rather have the frame be the limiting factor than the brakes.

Cantilevers have a fixed arm length from the pivot to the pad. This length is pretty short on most designs, with allows them to be stiff without being overbuilt. Cantilevers for 45mm tires and fenders are the same as cantilevers for 25mm tires and fenders. Caliper brakes for 45mm tires and fenders are either going to be much heavier or much more flexible or both compared to ones for 25mm tires and fenders.

Cantilever brakes are adjustable for mechanical advantage. Most of the time this isn’t necessary, but sometimes it is useful. On a load carrying bike I can run a higher mechanical advantage for quicker stopping. On a bike with a long run to the rear brake (such as a tandem or recumbent) I can run a lower mechanical advantage to prevent the brakes from bottoming out due to cable stretch.

The cantilever design has been around for a long time and the pivots are still used by V-brakes. Millions of these brakes have been made. In 20 years I’ll have no problem finding replacement brakes for a cantilever-equipped bike that I buy today. 57-75mm reach dual pivots have been tried before (Shimano Nexus and Dia-compe FS-E)and abandoned, and now are being tried again. In 20 years I doubt that replacement brakes will be made available. If you buy a frame which requires them today you can stockpile a couple of replacements for future use.

Conclusion

It is interesting to see how excited the community is becoming over a brake that none of us have ever used. It will be interesting to see how things look in 6 to 12 months after riders have put a couple of thousand miles on this new brake. Maybe I’ll fall in love with them and take back much of what I’m saying in this article. Maybe others will understand why I’m not excited about the brake.

I hope that Kogswell and other builders consider selling bikes which work with either type of brake, at least until the new brake proves itself in the marketplace.