Archive for the ‘Bicycles’ Category.

Loaded Touring with the Kogswell P/R Prototype

The Kogswell Porteur/Randonneur (aka Kogswell P/R)is getting a lot of buzz in online forums as an exciting new bike. The most interesting this about this bike is not the weird wheel size (584mm aka 650B), or being the first TIG welded Kogswell, or the fact that it fits wide tires. The most interesting thing about this bike is that uses a low trail steering geometry. Just to give customers many options Kogswell is selling the bike with three different forks to allow the customer to tailor the steering geometry and handling of thebike to their needs.

Jan Heine, Mark Vande Kamp and I evaluated the handling differences of the three different forks for Vintage Bicycle Quarterly in Volume 4,Number 3. As a result of that testing I found that I preferred the fork with 40mm of trail. It works well unloaded or with a light rear load and best with a front load.

This was a difficult trip for me to pack for. I was planning on riding the Vancouver Island logging roads with stretches as long as 3 days between towns, so I knew I couldn’t go ultralight. I also was carrying a 5.5lb tent for two instead of the 1.5lb hammock that I’d carry if I was riding solo. While touring I like to use my Cobbworks Oyster Bucket panniers even though they are a little bit heavy because they are waterproof and make great stools in camp or at rest stops.

While planning for this trip I knew that the bike would do best with a front load, but I also wanted to get away with carrying only two panniers and the buckets work best on the rear. As a result my original load looked like this:
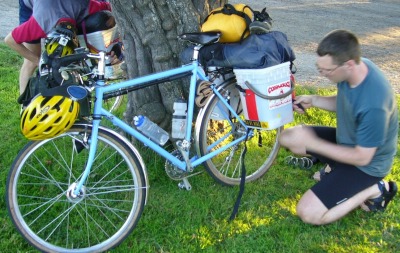

Rear Heavy Load (photo by John Speare)

I put most of my food into the front handlebar bag, clothing into one rear bucket, the stoveand a few misc items into the other bucket, and my tent, sleeping bag, and sleeping pad on top. I did not weigh my gear before leavingbut I’d guess that I had about 25# on the rear of the bike and 10# on the front. Lifting the bike made it obvious that there was a heavy rear bias.

It wasclear from the first ride around the ferry terminal parking lot (and sadly 3 hours from home) that this was not the ideal setup. The rear load made the front of the bike too light and the bike would easily shimmy. Larry (a touring partner) pointed out that my buckets were located behind the rear axle,so I slid them as far forward as possible and this helped a great deal,but the handling was still not very good.

That night I thought about how to fix the bicycle’s handling. I knew that I needed to get a front rack, but I didn’t think that putting the buckets on a lowrider rack would leave me with the necessary bag capacity. I still needed somewhere to put my tent, sleeping bag, and pad. I considered using compression straps to fasten those to the rear rack, but decided that I ultimately needed to get some panniers for the front. The Ortlieb Backrollers that I use for commuting were on their way out anyway (after 10 years of daily use), so I decided to purchase a new pair.

The next morning I visited some bike shops in Victoria, BC and purchased a pair of panniers for the front and a lowrider front rack. I moved everything that was strapped down to the rear rack to the front along with a few items from my buckets. It was obvious from my first lifting of the bike that the weight distribution was much better.

This is what the bike looked like with the new gear:
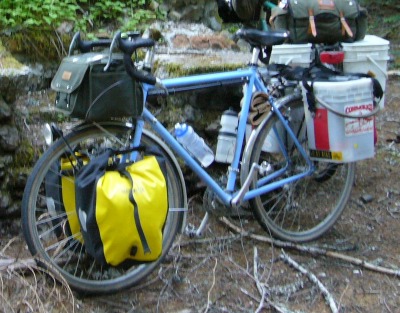

Balanced Load (photo by John Speare)

It was clear that the handling was much better even after a couple of miles. Lesson learned, low trail really does mean having a front or balanced load.

Once properly loaded the Kogswell P/R worked nicely as a loaded tourer. This bike was designed around wide tires and I ran it with the 36mm wide Panaracer CdlV. This tire worked very well on pavement, crushed limestone trails, and dirt logging roads. Even with a heavy front load the bike was comfortable to ride all day, never fought me in the corners, andcould be ridden no hands for short periods.

My bike is a prototype and the list of brazeons differ from the production bikes. The prototype had almost everything that I’d want for touring, but I’d still let to see a few additions. The highest priority would be having a third waterbottle cage location mounted under the downtube. Two bottles of water is good, but three is even better. My prototype didn’t come with mid-fork brazeons for a front lowrider, but I know that they have been added to the production frames. Otherwise the bike has everything necessary for loaded touring.

On my next trip I think I’ll concentrate on having a load biased towards this front. This will probably mean using the same handlebar bag, two buckets mounted on front lowriders, and a large saddlebag in the rear with no rear rack. I think that this would have provided the capacity needed for this trip while optimizing the load balance for this bike. For an overnight trip I would probably use only a handlebar bag and two small front panniers.

When I sold my previousloaded touring bike I was wondering if I made a mistake in assuming that the Kogswell P/R would be up to this sort of use. After 5 days on the road I’m here to report that it is, as long as you are careful to put at least half of your touring load up front. The bike really is a joy to ride when well loaded and I hope to use it on many trips to come.
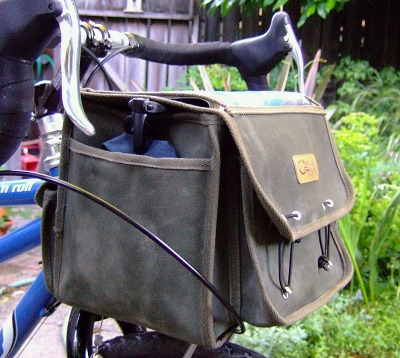
Gear Review: Ostrich Handlebar Bag and Velo Orange Decaleur

Introduction

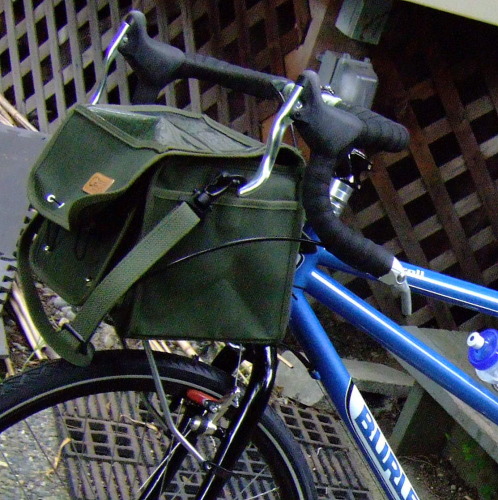
The Ostrich F104 is a French-style handlebar bag made of cotton duck. It is designed to mount to the handlebars, but have it’s weight supported from the bottom by a front rack. I’ve usedit with the Nitto Campee (sold by Rivendell as the Nitto Mini) and Nitto M12, but it would work with any front rack that has a top shelf. Normally the bag is secured to the handlebars with two leather straps, butVelo Orange makes a quick release device that will support the bag instead.


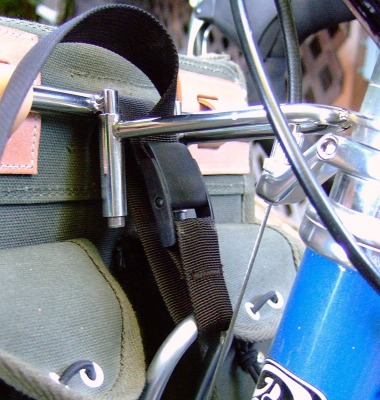
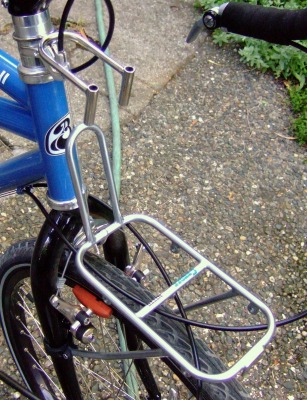
The front support rack and the bike-half of the Velo Orange Decaleur

This setup is quite different than most handlebar bags, but it has some big advantages. Most handlebar bags use a quick release clamp which mounts to the handlebars and which supports the entire load only from the bars. In comparison this bag is mounted lower on the front of the bike, which both improves handling and prevents the bag from blocking handlebar mounted accessories. The use of a front rack to support the load from the bottom allows for a heavier load than most bags can handle.

Bag Design and Use


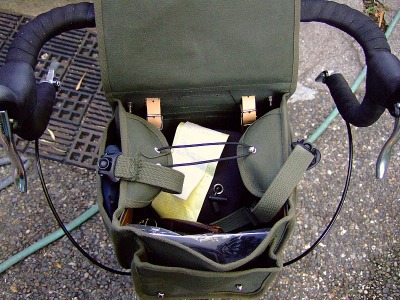
The rear and side bag pockets

The handlebar bag is quite large with a capacity of almost 13 liters. It is almost a cube at 260mm (10 1/4″) wide, 220mm (8 2/3″) tall, and 200mm (8″) deep. There are 5 pockets in addition to the large main pocket. The front of the bag has a wide and tall pocket that is about an inch deep that is useful for keeping small but important items like your sunglasses. The rear of the bag has two small pockets. I found that my wallet and cell phone fit perfectly into one of them and carried a small digital camera in the other. There are two thin pockets on either side of the bag. I carry a home made rain cover in one and left the other empty. The front, rear, and main pockets all use elastic shock cord over a metal loop as a closure mechanism. This is secure and yet very easy to open with a single hand.

At the top of the bag there is a map pocket. The map pocket is completely open on each side (unlike my other handlebar bags) and has a 1cm grid on top which can be useful when making measurements on maps. I didn’t think I’d like the open sides and worried that my maps would shift or fly out while taking tight corners, but this has not been a problem. I don’t like the grid, in bright sunlight it projects grey lines onto the map which can look like roads. I often found myself removing the map from the case to read it while riding due to this issue.


Top flap opened

One concern on the BOB and Kogswell lists is that the main flap on this bag opens backwards. The closure is on the front of the bag (facing away from the rider) instead of the back of the bag. I can reach the closure while riding to open the bag,but it requires more of a reach than other handlebar bags that I’ve used. On the other hand the elastic shock cord is easier to work with than the zippers or snaps on my other handlebar bags,so this makes up for having to reach farther. Once opened there isn’t really a downside to having the bag open the wrong way. I don’t ride brevets or other timed events, so I usually accessed the bag while I was stopped anyway. If I did need to access the bag while riding I would probably keep food and other fast access items in the side and rear pockets.

As I mentioned earlier this is a very large handlebar bag. At 12 liters ithas the same volume as one of my Ortlieb small front panniers. On my first ride with this bag I was able to fit a box of cereal, a large bag of musliex, a full change of clothes, my tools, and a bicycle lock. I do not have a problem carrying my normal commute load (change of clothes, maybe lunch, and tools) and usually have space left over (unfortunately it will not fit my laptop). While touring I could carry a many day food supply in it in addition to my wallet, phone, camera, sunglasses, passport, and book.

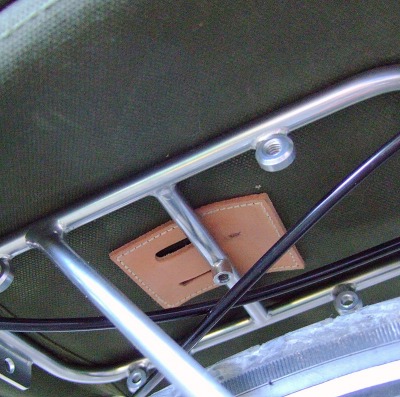
I used the handlebar bag exclusively with the Velo Orange Decaleur, but it came with straps for securing the bag directly to the handlebars and the top of the rack. The handlebar straps would only be useful if your rack to handlebar height matched that of this bag. I didn’t find the under the bag strap to be useful at all, it was turned the wrong way to work with my Nitto front racks and hard to reach to secure it anyway. I think it would be more useful if turned 90 degrees and located at the front edge of the bag instead of in the center.


The loop under the bag is not well located and is oriented the wrong way to be useful

Stylistically I like the design of the bag. It has leather only where it provides function and is otherwise made of cotton duck. There are internal stiffener plates for the sides and bottom to maintain the bags shape, but they can easily be removed for packing.

Decaleur Use

The decaleur is an optional item, but should be purchased with this bag. It makes installing and removing the bag trivial. Instead of strapping it to your handlebars you just lower the bag onto the decaleur and front rack.

The decaleur consists of two parts, both made of stainless steel. The first part fits into your headset stack and consists of a U shaped piece of metal with two downward facing tubes. The second part mounts to the bag and has two prongs which face downwards and fit into the tubes on the bike portion of the decaleur. Each part is available seperately, so you can buy one of the bike parts for each bike that you own and one of the bag parts for each of your handlebar bags if you want to move things around easily. You do need to mount the decaleur at roughly the same height (within a cm or so) above the front rack on each of your bikes. These photos show the decaleur mounted on a bike with a 1 1/8″ threadless headset, but they also make the bike portion for 1″ threaded headsets.

For road riding the decaleur by itself is all that you need to secure the bag to the bike. Just align the bike and bag portions of the decaleur and drop the bag onto the rack. When you need to remove it (to go shopping for instance) you just lift the whole thing off of the rack and go on your way. It couldn’t get much easier. Over large bumps the bagmight bounce a little bit, but never high enough to clear the decaleur.

While touring on logging roads I found that it wasn’t quite secure enough. I hit a pothole while descending and the bag bounced off of the front rack and out of the decaleur. I found that a velcro strap between each part of the decaleur was enough to keep this from happening, but it made installing the bag take longer. It would be nice to see the decaleur redesigned to have a positive locking mechanism. An easy running change would be to use longer prongs on the bag part of the decaleur with a hole drilled across the bottom of them. A small pin or spring clipcould be installed the lock the bag to the bike. Hopefully Velo Orange considers doing this in a future production run.


Securing the Decaleur with a compression or velcro strap

Compared to a front basket

I’ve been using a Wald basket on the front of my bike prior to getting the Ostrich bag. A couple of cyclists have asked me how they compare.

I think I’ll keep using both. The basket is ideal for bulky or oddly shaped loads such as groceries, large boxes, and bicycle tires. The basket does not carry small items such as keys or even gloves very well because they can fall through the open bottom. The handlebar bag is much more useful for carrying gear, but not as useful for riding.

The ideal solution would be a basket which worked with the decaleur. This would make it easy to use the handlebar bag for touring and longer rides and switch to a basket for shopping or packages which are too large to fit into the handlebar bag. I may modify my Wald basket to work with this system.

How I tested and limitations in my testing

I’m writing this review in late June after having owned this bag for about two weeks. In that time I’ve used it for about 75 miles of commuting as my only on-bike storage and for about 150 miles of loaded touring while also carryingfour panniers.

While commuting I typically put stuff that I needed to reach (keys, my bus pass, maybe a book or MP3 player for the bus ride) in outside pockets and used the main pocket for a change of clothes, breakfast or lunch. I carried tools in the flat side pockets. While touring I used the rear pockets to hold my phone, camera, and wallet, the front pocket to hold my sunglasses, a side pocket for a rain cover, and the main pocket for food, a book, and a long sleeved shirt. I’ve ridden with the bag carrying loads of almost no weight up to about 6.5kg (15 pounds).

I did not encounter any rain during the review period, so I can’t comment on how this bag would fair in poor weather.I did make a simple raincover for it (and I understand that Velo Orange will offer one soon) in case of rain. I don’t think that the bag would hold up to heavy rain very well without a rain cover. The cotton duck doesn’t seem to be waxed, the cover does not protect the sides of the bag at all, and the map case is completely open on the sides.

Conclusion

The Ostrich F104, Velo Orange Decaleur, and a front rack of your choice provide a great way to carry a light to moderately heavy load up front. They provide an accessible load with plenty of capacity (both in weight and volume) which is easy to install and remove from the bike. I expect to use this system, or something very similar to it, for a long time to come.

The bag could use a few minor tweaks. The bottom strap is not well placed (at least for my Nitto front racks) and is thus useless. It would probably be nicer if the lid opened in the other direction, but this is not critical. The map case should not have any gridlines. It would be nice if bag was designed for greater weather resistance.All of these concerns are fairly minor and should not prevent one from buying it.

The decaleur does what it was intended to do extremely well. I’d like to see a built in method of locking the bag to the bike, but there are suitable workarounds and securing the bag this way is only necessary on the roughest roads.

There is not much competition out there for bags which use this mounting system or provide this capacity and the Ostrich bag and Velo Orange decaleur are both very well priced compared to what else is out there. If you are considering a front handlebar bag in this style it is hard to go wrong with this solution.

You can buy the decaleur today at Velo Orangeand they should be getting the bags in soon. I also have larger and more photosof this bag on the bike photo section of my website.

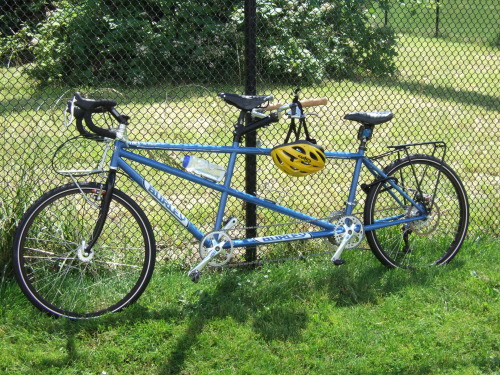
Our new tandem


click for more photos

About three months ago I made a deal with a bike shop owning friend to trade in our RANS Screamer recumbent tandem for an upright Burley tandem. I really liked the Screamer for long rides, but I wasn’t as comfortable riding it on shorter rides in the city. Almost all of our rides are shorter rides in the city, so the Screamer didn’t make a lot of sense. As a bonus the new owner of the Screamer is also my regular touring buddy and so if I ever want to use the Screamer for touring again it won’t be far away.

I originally thought I’d get a Burley Duet which is a very nice steel road tandem. The problem with the Duet is that it doesn’t take wheels with tires over about 35mm wide (or even skinnier with fenders). Fenders are must for me and I like to find dirt trails, so wider tires were also necessary. We decided on getting the Rock and Roll which is their nicer “mountain” tandem and converting it to drop bars. This is exactly what we did with our first tandem, a Cannondale MT1000.

The Burley Rock and Roll comes stock in black or yellow, neither of which was very exciting for us. We decided to upgrade to a stock color and after a bunch of looking ended up going with “Celestial Blue”. This is a nice medium blue with a hint of sparkle in the paint.

The tandem was ordered and scheduled to arrive in about 6 weeks (the long delay was due to the custom paint). 6 weeks came and went and I finally got a call late last week saying that the tandem had arrived. On Sunday I headed down to Olympia to pick it up (and play some bike polo). During the evenings this week I swapped out parts and built it up.

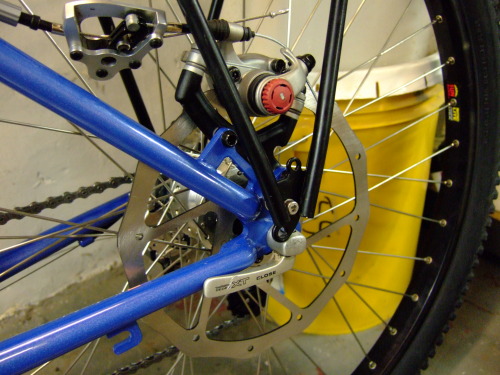
There were a few build challenges, but the bike has come together nicely. Stock the tandem came with a rear disk brake. This has caused a few issues: the disk brake caliper is setup for mountain bike brake levers and it sits right in the way of a rear rack. I solved the rear rack problem by drilling a new mounting hole in our rack that lets it sit a little lower. This opens up the space a bit where the disk brake caliper sits, and gives it just enough room to fit. The only downside is that it doesn’t leave enough space for our Burley trailer hitch.

I temporarily made the disk brake caliper compatible with drop bar levers by using a Sidetrak BPB. That is the device sitting right in front of the disk caliper. It is a simple lever that turns a small amount of cable pull into a large amount of cable pull. The BPB does the job but is ugly and cumbersome, so I have a new disk brake caliper on order that is designed to work with drop bar levers.

Everything else on the bike went together smoothly. I mounted a Nitto Mini front rack for holding a handlebar bag and that works great. I was hoping to be able to use a Nitto M12 front rack because that model mounts to the cantilever studs, but it didn’t fit on this fork. The Nitto Mini uses clamps that are a little ugly, but the black clamps disappear into the black fork and the final result looks good.

We took the bike on it’s inaugural ride yesterday down to the U District Farmer’s Market and the Fremont Solstice Parade. The bike rides great and will meet our needs wonderfully.

Parts list for the other bike geeks out there:

  • Wheels – Shimano HF08 (XT) tandem hubs, Sun Rhyno Lite rims,Schwable Marathon 26×1.5″ tires
  • Captain’s handlebars – Nitto Noodle 46cm,Dimension high rise 120mm stem, Tektro brake levers, Shimano Dura/Ace 9sp barend shifters
  • Stoker’s handlebars – Nitto Dove, Rivendell cork grips, Burley stoker stem, and unused brake/shift levers (we’re borrowing this setup from Christine’s single bike to see how the setup works on the tandem).
  • Captain’s seatpost and saddle – Ritchey Logic 29.8mm and Brooks B17
  • Stoker’s seatpost and saddle – Thudbuster ST. The saddle is a work in progress.
  • Drivetrain – Shimano 9sp front derailleur (whatever came with the bike), XT rear derailleur
  • Cranks – Thorn tandem cranks, 170mm front, 165mm rear, 50/38/24 chainrings, 42 timing rings
  • Front rack – Nitto Mini
  • Rear rack – Tubus Vega
  • Front brake – Suntour XC Pro
  • Rear brake – Avid BB7 Mtn with Sidetrak BPB, 203mm disk

alex

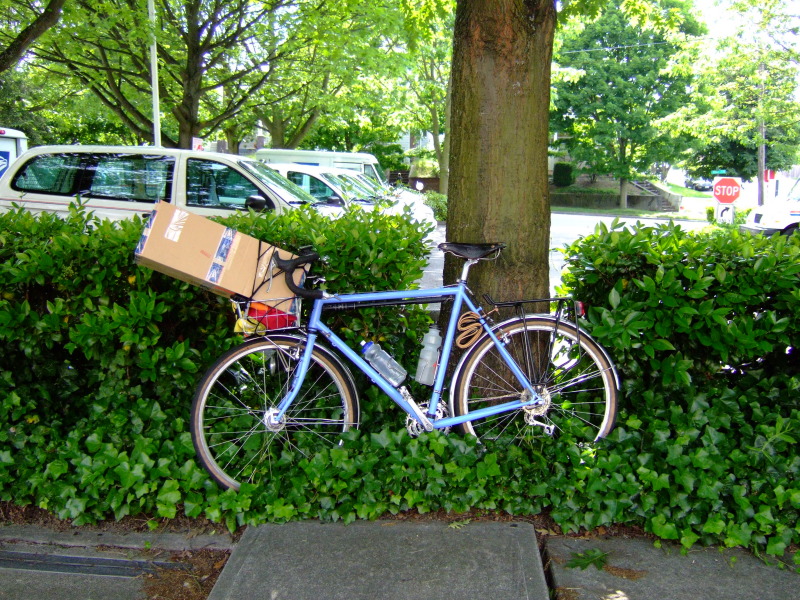
Big box, small basket

If Keith Gilstrap is reading this, that box contains your moustache bars.

Baskets are great. I would have needed my trailer to carry this if I didn’t have the front basket. I could have strapped it down to the rear rack, but I woudn’t have been able to see it and make sure that it wasn’t falling off.

The large box was just secured with a cargo net.

Seattle Ride of Silence

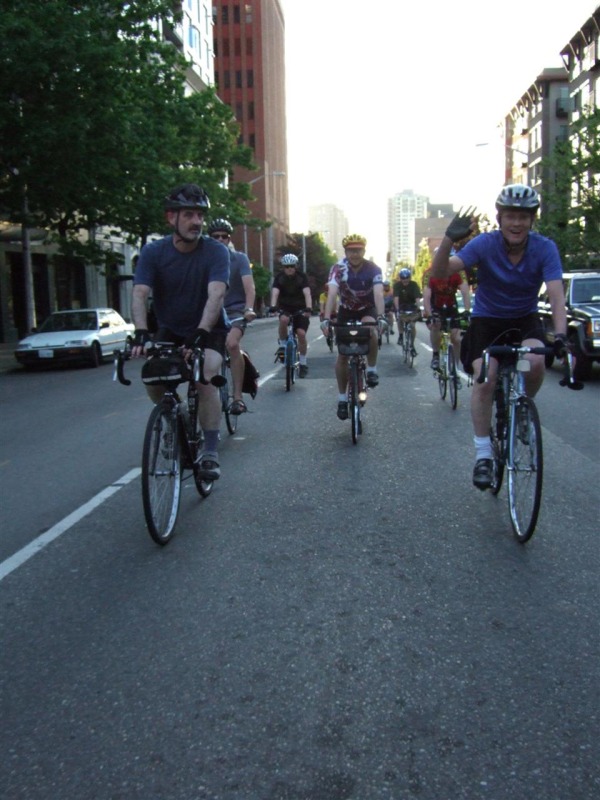
The Ride of Silence is a nationwide bicycle ride to mourn those that we know who have been injured or have died in bicycle accidents on the public roads. I joined about 500 (my guess) other cyclists for this ride in Seattle.

The ride had a lot of publicity here. There was a great article about it in the Seattle Times which highlighted a serious accident that Gypsie Goss (one of the owners of Aaron’s Bike Repair) had at the start of 2006.

As I rode down to the start of the ride at Gas Works park I came acrossdozens of other cyclists who were going to the Ride of Silence. Once there I found a lot of my normal cycling buddies from the BOB list and SIR. We formed a small group near the front of the ride.

I don’t have a good estimate of how many people were there, but the crowd was huge. We filled much of the Gasworks parking lot and the group spread down into the park itself. There were interesting bikes everywhere, from the Chair Bike that Aaron, Gypsie, and Braxton rode, lots of XtraCycles and tandems, some interesting homebuilt recumbents, dozens of fixed gear bikes, and lots of road bikes. Itwas probably the most inclusive bike ride that I’ve been to in Seattle just judging by the crowd who showed up.

Theplanned route went over the Fremont Bridge, skirted the side of Queen Anne, down 15th Ave to downtown, looped through downtown,up Eastlake,through the U District, and finally went back to Gas Works park.

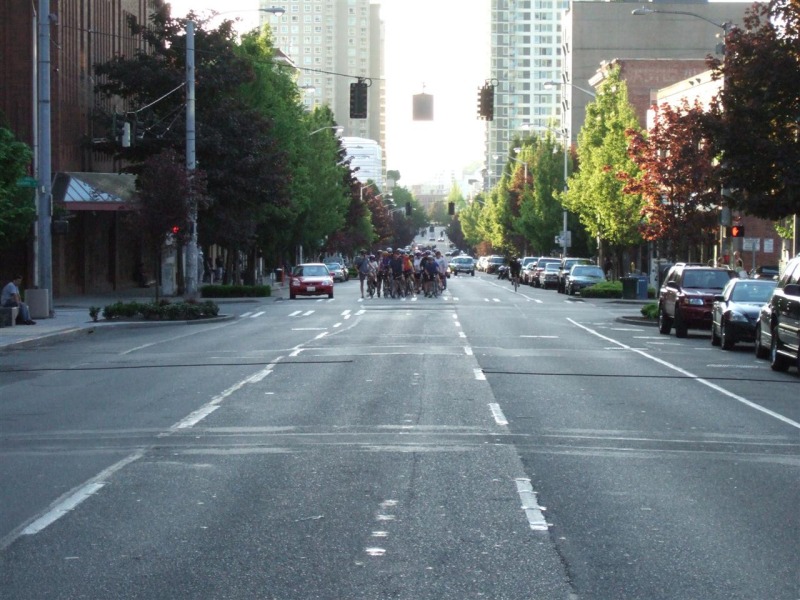
A few minutes past 7pm we headed out on the ride. At the first traffic light one of my major concerns was relieved. I was worried that cyclists on the ride would place more importance in staying together as a group then in traffic signals, but they didn’t. At Stone Way the light turned red and our group was divided. We kept going and caught up. This pattern was repeated throughout the ride, at times I was riding in a group with 20 people and at other times I was with a group of hundreds of cyclists. I loved looking backwards after one red light and seeing this view:

How often do you get to see a traffic lane jam packed with cyclists as far as the eye can see?

Having the group break up probably made a much larger time impact for observers. There was apparently a 30 minute steady stream of cyclists passing through a single point downtown. If we had held together this might have only been a 10 minute long group and less people might have seen us.

The cyclists on the ride did stick to the “silence” part of the name more than I expected. There was a little whispering here and there, but for the most part everyone was silent. The problem with this is that observers were always asking what we were doing, where we came from, and where we were going. No one would answer and I think this probably confused bystanders instead of forwarding our cause. Next year I hope to print up some business card sized flyers that I can hand out, and maybe others will do the same.

After the ride a few of us went over to Hale’s Ales for dinner and a beer and had a nice time hanging out.

Overall I think the ride was a moderate success. The biggest issue is informing the public on why we are doing the ride.

More photos

alex

Why I don't like long reach calipers

There has been a lot of excitement on the BOB, Kogswell, and Rivendell lists recently about the new (but not yet available) Tektro 556 long reach dual pivot brake. This is a pretty cool brake with a reach of 55-73mm, a good 16mm more reach than the now common 47-57mm reach dual pivots. Longer reach allows for fenders and bigger tires.

Here is a nice drawing of the brake from Kogswell:

The red line shows a fender and the purple shows a 38mm tire. Kogswell is so excited about this new brake that they plan on building all of their future frames around it. I’m not that excited. Here’s why.

Long reach caliper brakes — design problems

Long reach caliper brakes have much longer arms than the 39-49mm and 47-57mm reach brakes that we’re all used to. The longer arms either need to be thicker (and thus heavier) or they are more flexible. You might think “Alex, whats the deal, the brake is only 16mm longer”. True, it is only 16mm longer, but the arm length increases by more than 16mm. The width of the brake must be increased to keep the same mechanical advantage (and to fit around wider tires and fenders). If only the brake reach was increased then the mechanical advantage of the brake would drop. You can see that the whole brake is scaled up if you compare a 39-49mm and 47-57mm Shimano dual pivot.

How much longer does the arm get when you increase brake reach by 16mm? I didn’t know before writing this post, so I measured. I have some Shimano 47-57mm reach dual pivots and some Diacompe FS-E 57-73mm reach dual pivots. I measured the length of the arm holding the left pad from the pivot point to the bottom of the pad slot. On the Shimano brake it measured 117mm. On the Diacompe it measured 157mm. So 16mm of reach cost us 40mm in arm length between these two particular models. That is 40mm of extra arm that can flex.

The longer pad slots of over 57mm reach brakes also cause problems. The section of the arm where the pad is located has to be constant thickness and the thickness is determined by the design of standard threaded pads, not the brake. There will be considerably more flex at the bottom of the slot than at the top. You can easily see the difference in this photo:

Note how long the thin pad-mounting area of the black brake 73mm reach brake is compared to the silver 57mm reach brake.

Cantilevers

Okay, we’ve discussed why I’m not crazy about super long reach brakes. Why is there a demand for them? It is because many cyclists don’t like the most common alternative, cantilever brakes.

There are a couple of reasons that people state for disliking cantilevers:

  • Complicated setup
  • Squeal
  • Asthetics
  • Fork design

Cantilevers do have a complicated setup,especially the designs from the early 90s that most people are familiar with. The pad setup is complicated because most deisgns use a single fixing bolt adjusts five different variables — pad height,rotation around the pad, toe in, distance from the brake to the rim, and angle compared to the rim. If you want to adjust one of these you end up adjusting all five. Modern cantilevers use threaded pads which reduce this to four variables (distance is fixed)and just eliminating that one variables makes setup a lot easier. Some good brakes (such as the Avid Tri-Align) from the mid 90s had nice designs that used multiple bolts per pad and reduced the number of variables to two or three per bolt.

Pad setup isn’t the only complicated factor about cantilever setup. Cantilever brakes use a straddle cable and the straddle cable height changes the mechanical advantage (power) of the brake. This is both complicated (because you need to understand the relationship) and very flexible, because you can tailor the brake to your exact needs. Most people don’t care about this flexibility and are happy with the one mechanical advantage given to them by dual pivot calipers. Modern cantilevers typically use a “link cable” instead of the straddle cable. This fixes the height of the straddle cable and eliminates this complication while giving you a similar mechanical advantage to a dual pivot brake. You can learn more about cantilever geometry on Sheldon Brown’s The Geometry of Cantilever Brakes article.

The complicated setup of cantilevers results in squeal on a lot of bicycles. It is easy to get the brakes working well enough, except for squeal. Cantilever brakes (especially inexpensive ones) typically have more play in them than caliper brakes and will squeal. Cheap calipers (like the Diacompe FS-E described above) also have lots of play and will often squeal too. For the last 25 years there have been many more cheap cantilevers produced than cheap caliper brakes (due to the mountain bike boom), so most people associate squeal with cantilevers.

It takes time to learn how to setup cantilevers, but with quality brakes you can rid of squeal and easily get a good setup. It doesn’t necessarily take a lot of money to get quality brakes. The Shimano cantilevers on my Rivendell Quickbeam retail for about $20 for a bikes worth and don’t squeal. They use a link cable so straddle cable setup is easy. They do have the old pad design, so pad setup is still tricky.

Matthew from Kogswell isn’t a fan of cantilever brakes because it gives him less flexibility in fork design. With caliper brakes the load is all in the fork crown, so running thin fork blades is not a concern. With cantilever brakes he needs thicker blades (at least down to the cantilever studs) which can resist the forces from the brakes. He thinks that he can design more comfortable forks if he uses thinner blades, but he can’t use thin enough blades with cantilevers.

I agree that this can be a concern, but I think that it is a minor one. Almost all of the flexibility in a fork takes place at the bottom of the steerer, not in the fork blades. Some engineers say that the fork blades don’t bend at all. I don’t know if that is true, but I can say that my bikes built for cantilever brakes don’t feel stiffer in the forks than the ones built for caliper brakes.

This brings us to asthetics. Some people find cantilever brakes to be ugly. As functional bike parts I don’t really find them to be any uglier than a crank, pedals, or rear derailleur. All are essential parts of the bicycle and fit a specific and useful roll. I don’t find caliper brakes to be more pleasing to look at.

Okay, so now we’ve talked about why people don’t like cantilever brakes. Why do I prefer them?

Cantilevers have much better clearance than any caliper. Cantilevers can clear tires up to about 2.5″ in diameter, including fenders. I like having the option of running wider tires on my bikes, even if I don’t always need to, and would rather have the frame be the limiting factor than the brakes.

Cantilevers have a fixed arm length from the pivot to the pad. This length is pretty short on most designs, with allows them to be stiff without being overbuilt. Cantilevers for 45mm tires and fenders are the same as cantilevers for 25mm tires and fenders. Caliper brakes for 45mm tires and fenders are either going to be much heavier or much more flexible or both compared to ones for 25mm tires and fenders.

Cantilever brakes are adjustable for mechanical advantage. Most of the time this isn’t necessary, but sometimes it is useful. On a load carrying bike I can run a higher mechanical advantage for quicker stopping. On a bike with a long run to the rear brake (such as a tandem or recumbent) I can run a lower mechanical advantage to prevent the brakes from bottoming out due to cable stretch.

The cantilever design has been around for a long time and the pivots are still used by V-brakes. Millions of these brakes have been made. In 20 years I’ll have no problem finding replacement brakes for a cantilever-equipped bike that I buy today. 57-75mm reach dual pivots have been tried before (Shimano Nexus and Dia-compe FS-E)and abandoned, and now are being tried again. In 20 years I doubt that replacement brakes will be made available. If you buy a frame which requires them today you can stockpile a couple of replacements for future use.

Conclusion

It is interesting to see how excited the community is becoming over a brake that none of us have ever used. It will be interesting to see how things look in 6 to 12 months after riders have put a couple of thousand miles on this new brake. Maybe I’ll fall in love with them and take back much of what I’m saying in this article. Maybe others will understand why I’m not excited about the brake.

I hope that Kogswell and other builders consider selling bikes which work with either type of brake, at least until the new brake proves itself in the marketplace.

New life for an old trailer

I’ve been quiet for a while, but this doesn’t mean I’ve been idle. Today I’m just going to play blog catchup.

Some very close friends had their first baby (a girl named Alcyone, this is important later) about two months ago. Almost immediately they started to ask me about bicycle trailers.

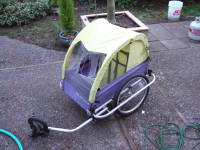
Two weeks ago I found this one in Craigslist:

It is an old Burley d’Lite. The seller seemed surprised that I’d want to buy it given the shredded front window, but at $20 it was a very good deal.

I took it home and looked at it more closely. For the most part it was in quite good shape. The window was shredded, the seat was pretty dirty, and there were a couple of small tears, but the frame and wheels were in good shape, it included the stroller kit, and everything else still worked. Not bad considering that these trailers sell for $400 or more when new.

I spent the next couple of evenings fixing up the top of the trailer. The first item was to sew in new screening. I bought some no-seeum-netting from Seattle Fabricsand sewed it into place. Luckily this went pretty easily (I had been worried about sewing next to the elastic on the sides of the top, but it wasn’t a problem at all).

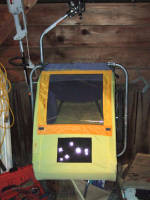
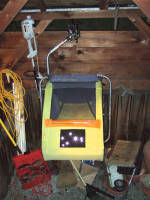
One of the missing features of this old trailer compared to the new ones was a roll-down windscreen. Since Alcyone and her parents live in cold Missoula, MT I thought this was going to be an essential feature (and a friend who lived in Spokane agreed). So my next project was to make a rolldown windscreen. I used some yellow/orange packcloth and clear vinyl to make it. The windscreen is sewn into the top at the top of the trailer and velcros into one of two positions, rolled all the way down or rolled all the way up.

The black flag at the top of the trailer was my final piece of work. Remember that their daughter’s name is Alcyone. This is the name of the largest star in the Pleiades (also known as the Seven Sisters). I found an image of the Pleiades,did some more research to figure out which of the dozens of stars in the Pleiades are considered the brightest seven,and made a map of it to decorate the top of the trailer.

I’m really happy with how everything came out. I probably should have used black around the window instead of yellow/orange, but it is good enough. The Pleiades map really personalizes the trailer. The $20 and hours of time that I spent on the trailer made for a much more personal project then if I had just spent $400 and bought a new trailer.

I think that these old Burley trailers are probably a goldmine for cargotrailers too. It would be pretty easy to buy one of these, remove all of the seating and top, and sew in a flatbed floor, making a discount version of the Burley Flatbed trailer.

Bike Swap

Yesterday was the Seattle Bike Swap. I split a table with iBOBs John Speare and Mark VandeKamp. It was a pretty successful swap for me, I sold off all of my singlespeed and fixed gear stuff,my mountain bike frame,and a bunch of small parts. I still have more stuff (mostly 406mm tires and wheels, maybe a couple of panniers) to sell off on eBay, but my spare parts pile is looking pretty good. I didn’t buy too much either, just a bunch of cantilever brakes, a Ritchey 110/74 crank, and a seatpost.

Swap is the bicycle highlight of the year for me. It is the one time when almost all of the bike geeks around Seattle get together in one spot and chat about bicycles. The number of interesting to me parts is dwindling, but I think that is because the only mainstream parts that I really liked were mountain bike drivetrain and brake components from the early to mid 90s and what would have made it to a swap has already been sold.

John Speare and I learned that we’d be better off selling full bikes than frames and parts. He had a really cool Terry-like Novara 48cm frame and wheels that I thought for sure would find a buyer, but it didn’t. It is now in my basement if that short description piques the interest of anyone. The “Tandem from Hell” didn’t sell until the last minute, but it got a lot of looks. This was an early 80s Santana Soverign frame that someone had added a Softride beam to then repainted and wrote “Tandem from Hell” on it. An interesting bike and I thought it would find a buyer (Santana tandem frames for $50 aren’t very common) but it ended up going out at firesale prices as we left the swap.

This leads to the best moment of the swap: John Speare sells the tandem to Joe for $25.Thirty secondslater someone else walks up and asks about it and Joe realizes he doesn’t really want it and resells it to the new guy for $20. Then realizes he just lost $5 in about 1 minute. It was much funnier in person.

We had my Kogswell Porteur prototype on display in the booth and it got a lot of attention. Some folks hoped it was for sale,a lot knew it was going to be there and just came by to check it out. I think Kogswell will be pretty successful with this bike.

I wonder what I’ll be selling next year?

alex

Compact cranks

The current fad in road bicycles is to move to 110mm BCD “compact doubles”. Compared to a 130 or 135mm BCD this lets you run slightly smaller chainrings. A typical 130mm BCD double has 53/39 chainrings, where a typical compact double has 50/34 chainrings. I’ve talked about this many times on the BOB and RBW lists, but a conversation yesterday with Jan Heine reminded me of it and I thought it would make a good blog entry.

I’ve been experimenting with compact doubles on and off for 5 or 6 years. I started with a 110mm double (this was a fairly common crank in the 80s). My first bike setup like this had 50/34 chainrings with a 12-25 7sp cassette. Just looking at those numbers this sounds like a pretty reasonable setup: a high gear of 112″ and a low gear of 36″. Indeed the range worked well for me.

The problem with this setup is that my normal gears lived in the crossover range of the drivetrain. This meant that I was always shifting between the chainrings. Even worse when shifting chainrings I also had to shift many cogs on the rear due to the large difference in chainring sizes. This becomes more obvious when you chart out the full gearing:

50 34
12 112.5 76.5
13 103.8 70.6
15 90 61.2
17 79.4 54.0
19 71.1 48.3
22 61.4 41.7
25 54 36.7

From riding singlespeed I know that my normal cruising gears are in the 60-70 gear range. 70″ is the right gearing to go about 18mph at about 85rpm, a comfortable cadence. When you look at this gearing chart you can see that this gear is near the end of the cassette. So if I’m out the outer chainring and come to even a moderate hill I’m quickly dropping down into the 34t chainring. Likewise if I’m on the small ring and crest the hill I instantly need to shift into the outer chainring. Worse was that I ran this combination on a short chainstay bike (a Miyata 912 with 39.5cm chainstays) so using the 34t ring with the 2 smallest cogs or the 50t ring with the two largest cogs was noisy and inefficient. After about two weeks with this setup I changed the bike back to a triple.

This gearing is suited for someone, but it is someone who normally rides an 80″ to 90″ gear, not a cyclist who normally rides a 60-70″ gear. Even a 53/39 double would be better here because at least I could do most of the riding on the 39, just changing chainrings for long flat sections or downhills.

A Ritchey 94/58 crank setup with 46/31 chainrings

A couple of years ago I started experimenting with compact doubles again. This time I chose cranks with an even smaller BCD: 94mm and 86mm. 94mm BCD was commonly used on mountain bikes in a 94/58mm BCD triple. The smallest ring for 94mm BCD is 29t, but those are hard to find. 30t and 31t are a little easier, and 32t is very common. You can get large rings up to about 48t pretty easily. 86mm BCD was used on touring triples in the 70s and 80s where all three rings were mounted to the same BCD with extra long bolts. These cranks were made by SR and Stronglight. A typical setup would be 48/38/28 or 50/45/28. 28t is the smallest ring made.

Another change was putting on wider range cassettes. All of my bikes now have 8sp or 9sp cassettes. That one extra gear makes a noticable increase in cassette range. Here is what a 94mm double with 46/31 chainrings and a 12-28 8sp cassette looks like:

46 31
12 103.5 69.8
13 95.5 64.4
14 88.7 59.8
16 77.6 52.3
18 69.0 46.5
21 59.1 39.9
24 51.8 34.9
28 44

29.9

Look at what has changed. My cruising gear is now in the center of the cassette with the 46t chainring. The gear range on the 46t chainring extends down to 44t, low enough to let me climb most hills. The smaller large chainring also let me get a smaller small chainring with good shifting and that now goes low enough for almost any hill when unloaded. I did give up a little on the high end, but I almost never use gears over 100″ so this is not a problem.

This setup works great. I can do 95% of my ride in the 46t chainring, only shifting the rear cassette. I shift the front only for long hills. On my normal 10 mile commute this means that I’m only in the small ring once,where I’d drop into it 8 or 9 times with the 50/34 setup.

The hard part about getting real compact doubles is finding the cranks. If you want to experiment with this your best bet is finding a 86mm triple crank. The Trek touring and triple bikes sold in the early to mid 80s often came with the 50/45/28 cranks. These are reasonably easy to find on the used market and are nice production bikes which ride well. You may be able to find the entire bike used at a garage sale or swap meet for the price of a new crank. To make a compact double just remove the 50t large ring and replace the chainring bolts with double bolts instead of triple. You’ll also be able to put in a shorter bottom bracket (I think 107mm or 110mm is what I used) and you’ll end up with a lower Q-factor. Try this out with the 13-28 6sp freewheel that the bike probably came with and I think you’ll be a convert.

If you are lucky enough to have a Ritchey Logic Compact Triple then these cranks also make great compact doubles. They are extremely well made,the silver ones have a nice finish,and the cranks have no built in spacers for the granny ring, so they easily convert to running as a double. The hard part is setting up the bottom bracket. As a triple these cranks want a 107 or 110mm bottom bracket. When you remove the inner chainring you need to get even shorter. The shortest commonly made bottom bracket is 103mm and these are not easily found anymore (Shimano sold one for the 8sp Dura/Ace cranks). This is still not quite short enough.

I removed the fixed right shoulder from a Dura/Ace 103mm bottom bracket so that I can slide the bottom bracket about 3mm to the left. This gives me a much better chainline when running as a double. These bottom brackets use a removable right “cup” so I can move my modified cup to another bottom bracket unit when this one fails (I have a few spares). If you like this setup then the best alternative is to buy a Phil Wood BB. They’ll make whatever length you can dream of and list a 102mm that should work well in this application since Phil Wood BBs already have an adjustable chainline.

The TA Carmina is also available in a 94mm BCD double. This is a nice crank, but looks very modern and costs over $300.

Leave the 110mm doubles to the racers who actually cruise all day in 85″ gears. Most recreational cyclists will find a 48/38/26 triple to be better than a 52/42/30 triple and likewise they’ll probably find something like a 46/30 double to be better than a 50/34 double. Try it and I think you’ll like it. If enough people try it and like it maybe we can get a special run of 94mm BCD double cranks from Kogswell or Rivendell.

alex

Sewing Project #2: A Small Saddlebag

A few days after Christmas I bought a sewing machine and started teaching myself how to sew. This was my second project, a small saddlebag. It is made from Cordura and I scaled down the design from http://www.geocities.com/lazyf62/saddlebag/sdlbag.html.

Saddlebag side profile

I’m pretty happy with how it turned out. It is the right size for a day ride without my panniers, but small enough that I can use it and panniers at the same time. The volume is somewhere around 300-350 cubic inches. There are no pockets (I originally made a side pocket, but it was really only large enough to hold my keys so I removed it).

I didn’t get a chance to make the straps for going through the saddlebag loops, so for now it is ziptied to a Carradice Bagman QR to hold the bag to my bike. That should be fixed shortly. This will also pull the top closer to the saddle and make the bottom flat as it should be.

I copied the drawstring closure from the current Carradice bags as shown below. I used some lightweight cloth called “supplex” for that.

Saddlebag side profile

I learned a lot from this project (as you’d expect from the first time doing anything):

  • Cordura is tough stuff to sew through. At the uppercorners I was going throughfour layers of cordura and two layers of nylon webbing. The stiffness of cordura also made it hard to line everything up to do all of the seams. If I were making this bag again I’d use a lighter pack cloth and just add the heavier weight stuff where I need it.
  • Matching your thread to your cloth makes it easy to hide sewing mistakes.
  • Seam rippers are very helpful for undoing mistakes.
  • I need to move the upper buckles to the top of the lid. They don’t provide enough compression when the bag is empty or nearly empty.
  • I cut the lid too short, it should be at least an inch longer. I might sew on an extension.
  • The “Baggins Little Joe” has it’s flat interior pocket design for a reason. On a small bag like this that maximizes capacity without being too complicated. I’ll probably copy those pockets if I make another one.
  • I didn’t make the holes for the supporting straps large enough for leather straps to fit. My holes are slots about 3/4″ by 3/16″. The Rivendell Baggins bags use a round 3/4″ hole and that is probably a more appropriate size.

Anyway, it was a fun and I think successful project. I look forward to making another one in (perhaps a little larger) in the future. For anyone else thinking about sewing bags this is a good first project because there is a fair amount going on (but not so much to overwhelm you) and it uses a very small amount of cloth. I bought all of the the cloth from the remnants section of Seattle Fabricsfor under $10 and have enough left over to make another bag that is about 50% larger.

alex