Archive for the ‘Bicycles’ Category.

New photos of taillight output

I thought of a better way to show the brightness of this home made tail light:

This shows the output of a Vistalite Nebula with pretty fresh AA batteries:

This is the output with my homemade light:

Yes, my basement is a huge mess. Want to help me clean it up?

A homemade dynamo taillight

A couple of years ago Mark Vande Kamp showed me a taillight that he was making. It looked neat on his workbench and then I sort of forgot about it. A few months ago we were out on a ride and I saw it in action and was amazed at the light’s brightness. It is much brighter than any battery powered taillight that I’ve seen.

He needed to build another so we ordered some LEDs together and I made one too. I’m so impressed with the results that I plan on making them for all of my bikes. This is the prototype.

I used a Cateye fender mount reflector as the body of my light. I only have one of these reflectors, if anyone has a source please let me know. The LEDs are drilled into the reflector lens (Mark bought a 5mm drill bit for this purpose).

I tried really hard to take photos of this in operation and you can see all of my attempts in the gallery for this project. Here is the best of them:

The upper tail light is a Vistalite Nebula. It has 5 LEDs and uses 2 AA batteries and is one of the brighter LED battery based tail lights available. This is a recent model (purchased within the last year) and is much brighter than the ones that they made a few years ago. You can see that the lower tail light, my homemade one, is much brighter. It is bright enough that I don’t like riding behind it and I’ve had comments from other cyclists on rides that basically said the same thing.

I don’t have a way to draw a schematic, but I think that this one is pretty easy to explain.LEDs have a positive and a negative side. In the taillight all of the negatives are wired together and all of the positives are wired together (in parallel). Each LED is designed for 40ma and there are 10 LEDs wired in parallel, so they are consuming 400ma total. The dynamo puts out 500ma total, so I’m over powering them a bit. There is a diode wired in the reverse direction of the LEDs to handlereverse current from the dynamo. You could make an even brighter taillight but wiring another 10 LEDs in parallel, but this one is already very very bright.

The LEDshave a voltage drop of 2V. 2V, 500ma is 1w (2 * .5 = 1).TheLEDs are only driven on half of the AC wave generated by the hub, so it is more like1/2 a watt. You could run these LEDs off of a battery at a 50% duty cycle like this, but with 2 AA batteries you’d only get a lifespan of about 10 hours. Thatexplains why the taillight is so bright.

The taillight is wired in series with the headlight. This is important and beneficial. It requires that the hub generate a little more power, but lets me usea 3w bulb up front.

I explained the schematic,let me explain how I wired it.There are 3 rows of LEDs and 4 rows of wire. The bottom row is wired to the negative pin on the bottom row of LEDs. The second from bottom row of wire is connected to the positive side of the the bottom row of LEDs and the positive side of the middle row of LEDs. The third row up is wired to the negative side of the middle row of LEDs and the top row of LEDs. The last piece of wire connects the positive side of the two LEDs. One of the black jumper wires connect the each of the positives together and the other connects each of the negatives together. The wires going to the dynamo are connected with one on a positive bus and one on the negative. Dynamos generate AC and LEDs are DC devices,so there is a diode wired in the reverse direction of the LEDs to handle current flowing in the other direction.

Note that my soldering is really messy. I mis-wired things the first time and had to desolder everything and start over. I’d also recommend covered everything in epoxy or tool dip to protect it from vibrations. When I build a second light I’ll update the gallery with photos of a nicely soldered one.

Someday I’d like to figure out how to build a standlight for this design. That will add complexity and the current design is really simple and very effective. If you have basic soldering skills and have a dynamo hub then I’d recommend building one. The parts are cheap (the reflector was in my parts cabinet, the LEDs cost 75 cents each, and the diode was about 50 cents). I guarantee that you’ll be surprised at the brightness.

The porteur rack is installed and went on it's first farmer's market run today

The rackwas installed on my Kogswell last night and went on it’s first voyage today. It is working wonderfully. The porteur rack installs and removes very easily and the attachment between the racks is secure and rattle free. I brought back about 10-15 pounds of groceries with no issues.

I put a lot of new photos in the rack gallery showing the interface between the racks and some of the other details.

I did run into one minor problems. One is that the cable routing that I had for my barend shifters didn’t work when I mounted to porteur rack. I’ll figure out something else later, in the meantime I setup downtube shifters. The barends are still installed but not hooked up to anything.

Anyway, it is a great setup and I think it really completes this bike. I hope to get many great years out of it.

Two bike projects wrapping up at the same time

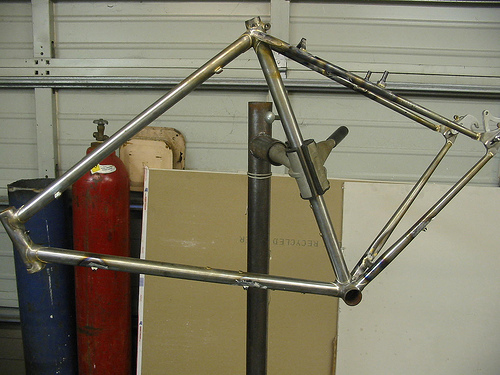
It’s been a good day for me. I got email this morning from the guy building my new bike frame that my frame is almost done and he had uploaded new photos. This is going to be a great bike, I can’t wait to get it. It is built for a Rohloff hub, has a low trail fork geometry for good handling with a handlebar bag, and clearances for huge tires (45-622 knobbies, so small “29er” tires).

new frame, almost done

This evening I got home from work and had an email from Alistair Spence saying that my new porteur rack is done and the flux is soaking off at his house. This rack uses a really cool design that we both worked on, it converts from a handlebar bag rack to a porteur rack with only two bolts. I got to spend a lot of time with Alistair as he built the rack, brazed a few of the joints, and learned a lot in the process. Expect some of my own rack projects to show up on this blog soon, a torch and other supplies are on my to-buy list.

I’ve never bought a custom rack or custom frame so it’s very cool to me that bothhad their brazing workfinish up on the same day.

More photos:

alex

My new favorite outdoor fabric

Kent Peterson has raved about the Marmot Driclime shirt a few times. I’ve looked for it, but somehow every retailer seems to be out of stock when I’m ready to actually buy one. On one of my quests for the Driclime I found a neat softshell jacket from Ibex at Second Ascent(probably my favorite outdoor gear retailer). The Ibex jacket was made from this neat fabric called Climawool that has merino wool against the skin and a tight woven nylon against the wind. It seemed ideal — keep the wind off, add some insulation, and I could probably ride through anything from 30F to 50F.

The Ibex jacket that Second Ascent sold didn’t fit me (L was too large, M was too small), but I happened to check the Ibex website when I got home and foudn the Ibex Breakaway. With any other company you’d assume that if one jacket didn’t fit you then another wouldn’t as well, but I know from past experience that Ibex sizing is all over the map. The Breakaway jacket was even better than the one that I found at Second Ascent because it only had the Climawool on the front. The back is a heavy regular merino wool, all the better for breathing.

I ordered one and it showed up in mid-November. It fit perfectly. This jacket is sold for XC skiing, but is perfect for cycling. There is a large pocket in the back with a zipper and a small one in front over the left breast. The back of the jacket is cut longer to work well when leaning over on your bike.

I’ve probably worn this jacket every day since getting it and it has done everything that I wanted. The front really does an effective job at keeping the wind off. The whole thing is just the right warmth to be comfortable from about 30F to about 50F with a thin wool t-shirt (longsleeve or short) underneath. Even in a light to moderate rain (about all that we get in Seattle) the fabric keeps me warm and dry enough. The breast pocket is the perfect size for my MP3 player (for listening on the bus) and the back pocket is big enough for my keys, cell phone, and a snack.

While shopping for Christmas presents at Second Ascent I found some used Ibex pants made out of the same material. They are also sold for XC skiing under the name Ibex Guide Lite. I’ve been wanting new Seattle winter pants for a while and really wanting something that didn’t look so much like tights and these are perfect. The cut is tight enough that they don’t get stuck in my chain, but loose enough that I can wear them into a store without looking like a cyclist (they just look like black sweat pants).

This Climawool stuff has really changed what I carry for commuting. My winter commute pannier used to have all of this:

  • short sleeve wool jersey
  • long sleeve wool jersey
  • bike shorts
  • bike tights
  • rain pants
  • rain jacket
  • and sometimes a windbreaker vest

I’d layer and unlayer as necessary. I was never really comfortable.

Now I’m just carrying:

  • long sleeve wool t-shirt
  • bike shorts
  • Ibex Guide pants
  • IbexBreakaway jacket

Ibex stopped making the Breakaway,but they replaced it with the Dash Hybrid. If it is the same jacket,and it looks like it might be, then it is a winner. It’s even on sale as I write this. No, I don’t work for Ibex. I never even cared for their products that much before writing this. But this Climawool stuff is great.

Cycling to the Post Office

This morning I took all of our Christmas gifts by bicycle to the post office. There was no way to carry a 18×18x21″ box on my rear rack, so I used the trailer. Hiding underneath the huge boxI had two more boxes of a more normal size (16×16x6 and 4×4x4):

I love biking to the post office. It is always a little challenge to see how to best carry boxes on a bike. Once at the post office I can use my bike trailer as a cart and roll it up front. This is very helpful if I have multiple large packages that would require multiple trips from the car. Finally it’s a great excuse to get out on the bike for a short ride.

For smaller loads baskets work well too:

What to do with all that crap…

I have lots of bags. Too many bags.

I noticed a few months ago that there is a lot of open airspace above the basement stairwell. I realized that I could stick my not very often used bags up here. The problem is that my arms aren’t ten feet long, so I couldn’t reach any hooks mounted up by the ceiling.

This weekend I made it work, despite my human length limbs. A couple of pulleys and cleats from the hardware store, a little scrap lumber and rope, and it all went together.The (teenage, probably daughter of the store owner) clerk at the hardware store said: “I love rope cleats. I wish I had a use for cleats. They are so perfect”. I agree, pulleys and cleats rule.

At the end of each pulley is a hook with a few links of chain. The chain goes around the hang loops or handles on the on bags and backto the hook. Once connected the bags are pulled back up to the ceiling. I fit a few backpacks, three saddle bags, a handlebar bag, my camping hammock, and more panniers then one person really should own (4 or 5 pairs) up there.

More photos:

I hope someone else finds this to be a useful idea. I learned a couple of things:

  • The pulley will tell you what size rope to use. Using thinner rope means it’ll jam.
  • My Little Giantclone ladder works great in stairwells.
  • The little caribiner keychains sold at hardware store checkouts that say “Not for climbing use” work great as the hooks on the ends of the ropes.
  • I need to find my knot tying handbook.

alex

The Scenic Way Home

Kevin and I met at 5pm on the 520 biketrail. I could see him arriving from a hundred feet away, spinning along with the fast cadence of a single speed mountain biker riding on pavement.

Our destination was the Tolt Pipeline Trail, about6 miles away down the 520 and Sammamish River Trails. The Tolt intersects the Sammamish River Trail at Redhook Brewery. We pushed our way through a strong headwind on our way to the brewery. There we picked up a 3rd cyclist, Bill, and set off. Suddenly I felt a little out of place on my Kogswell 650B touring bike while these two had singlespeed mountain bikes.

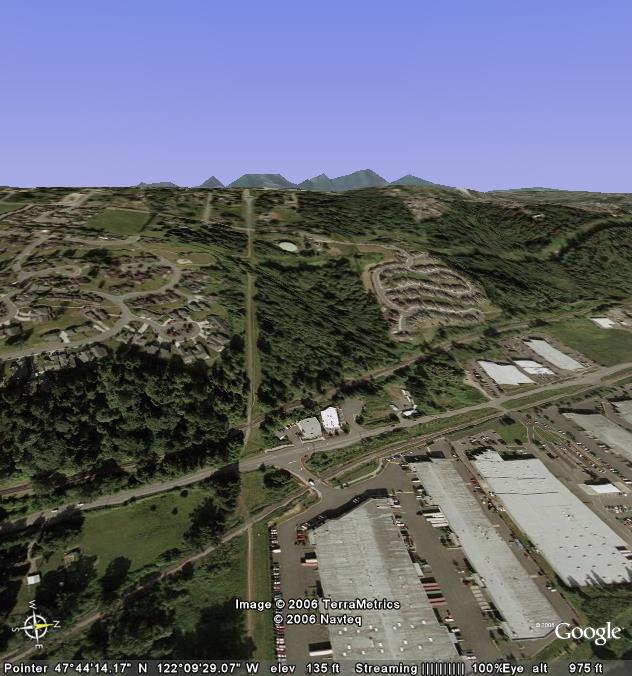
Many people have taken the Tolt Pipeline Trail east from Redhook, but I don’t know many who have taken it west. Kevin and Bill were interested in checking it out to add some miles to Kevin’s Thrilla suburban MTB route. I wanted to find something to break up the monotony of the Burke Gilman commute going home. We wound around behind Redhook and the ropes course and found the trai.

The Tolt Pipeline Trail is a trail that runs on top of the Tolt Pipeline right of way. Pipes don’t really care about hills and the trail doesn’t either. We knew that we had found the trail when the first view of it was a narrow and long clearing going straight up a hill.

The Tolt trail heading west is much like the Tolt trail heading east. There are often two sections to ride one, one is loose and chunky gravel and the other is compacted grass. I was glad to have my low 22×32 gear while churning up the hills.

At the top of the second or third hill we found some trails off to the side and explored them. We were hoping to find a singletrack detour for part of the trail, but that didn’t really pan out. We did find a hidden neighborhood playground and some overgrown trails through some woods that are about to be developed. This is where I remembered the limitations of wearing SPD sandals while riding offroad — blackberry thorns don’t feel good going into your big toe. I also remembered that the main disadvantage in riding a touring bike offroad is that the low bottom bracket doesn’t give you much clearance when going over logs.

We came to 405 fairly quickly and detoured around it. Kevin had very good notes and took the route around as if he ridden this area before. On the other side of the 405 we found some more of the same, mostly steep but not too steep climbs. The last one took us to the end of the trail. It ends at a large dropoff overlooking the Burke Gilman and Bothell below.

We took at right on the road at the top of the trail and then the next left onto 102nd and down through a newer neighborhood. Just behind some construction there was an old piece of singletrack that led us down a steep hill to Bythe Park and the Burke Gilman trail in Bothell. We explored the park for a little while hoping to find more singletrack, but came up empty handed. We had been riding for 2+ hours and had found the end of our ride.

After a quick dinner at the Bothell Ale House I headed back on the Burke Gilman Trail going to Seattle. I had just become dark enough to require a headlight and this was my first ride with a light in a long time. The trail turns into a different and much more peaceful place in the dark. There are few people and the main noise comes from wind rustling in the trees. I enjoyed that last hour’s ride home and it almost made me long for the coming fall when almost all of my rides will be in the dark.

Almost 5 hours after leaving work I was home.

Dreaming of cargo bikes…

When I was a kid I went with my family to Zimbabwe a few times to visit relatives. One of the things that I remember from these trips were the basic cargo bikes. They used a smaller front wheel so that they could fit a huge basket.

I often integrate the bus into my bike trips so most cargo bikes or XtraCycle conversions wouldn’t work for me. While thinking about this I remembered those African cargo bikes and thought it would be cool to make one.

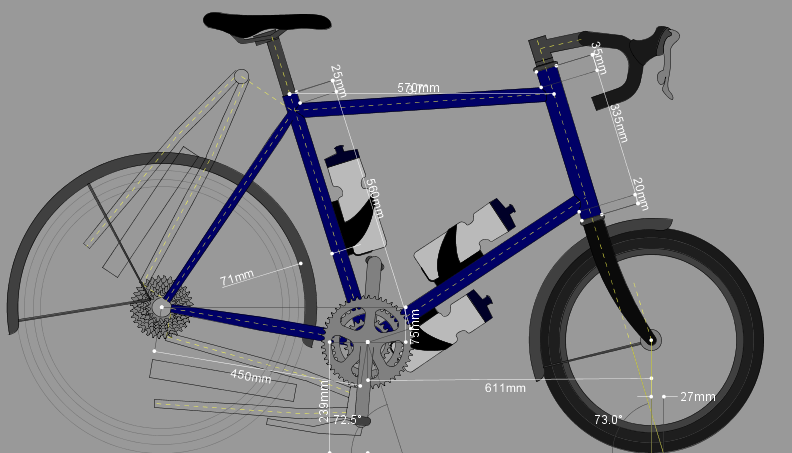
Here is what I came up with:

The rear wheel is 559mm, but the front wheel is only 406mm. The rest of the geometry is fairly typical touring bike geometry, except for much lower trail (to work well with big loads up front). It should be possible to fit a huge basket or flat rack on top of that front wheel. It shouldn’t be a big deal to carry a few grocery bags or a large box up front. The wheelbase is about the same as a normal bike, so it would work with normal bus mounted racks. Some folks will find the use of drop bars on a cargo bike to be weird, but I find flat bars to be weird. Flat bars would offer a little more cargo space, but I think that the bars are high enough off of the front wheel to prevent this from being a big problem.

I made this in BikeCADand the .bcad file is here.

Now I just near to learn to braze or weld…

Bike Distance/Time vs Car Distance/Time

I was talking to a friend today about a bike ride that I had just done and he seemed amazedat how far I had gone. I was thinking to myself that it seemed like a short ride. I had only ridden from Ravenna down to the north end of West Seattle and back to Lake Union.

While coming home I realized that this is probably a case of bike distance/time vs car distance/time. Cyclists (and pedestrians) move at a fairly constant rate no matter where they are riding. True I might climb more slowly or descend more quickly than my average speed, but at the end of the day my riding speed is pretty much always the same.

Cars are different. Some roads are built for very high speed travel and some are built for low speed travel. It takes me the same amount of time to drive to my mother in law’s house that is 4 miles away as to drive to my office that is 15 miles away. The big difference is that I have to take 30mph speed limit roads with lots of traffic signals to the mother in law’s, but I can drive at 60mph with no lights to get to work. Distance isn’t the most important factor here, it is the type of road and the number of traffic intersections.

I think this is one reason why I love city cycling. In the highest density parts of most cities there is no advantage to being in a car vs being on a bicycle when you look at the time that it takes to get from point A to point B. A 4 mile car ride that takes me 20 minutes (common in Seattle if you are going east/west) means I’m only averaging 12mph. On a bicycle I can pretty easily get the same average and I get some exercise and don’t have to look for parking. Isn’t being a cyclist great?

I should probably stop communicating bike trips in miles and just communicate them in time.

alex