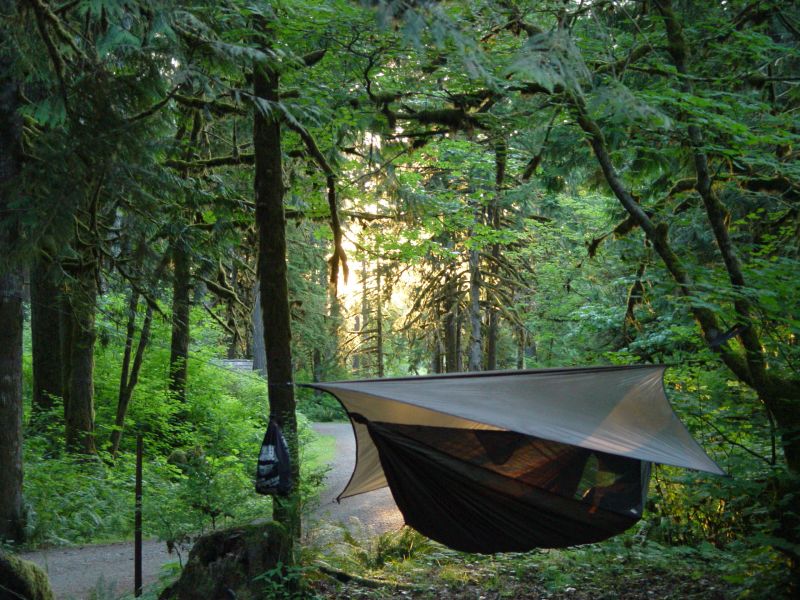
Lightweight camping equipment — what a difference

Christine and I are going hiking this weekend to Lena Lake in the Olympic National Forest. It is a nice early season hike with good camping and nice hiking beyond the campground. Last time I really loved the contrast between the dry river bed and the mossy boulders. The old digital camera that took these photos doesn’t do it justice compared to the mental images in my head. Christine hasn’t gone backpacking in many years and this might have been our last backpacking destination 7 years ago. I’ve gone on and off over the last 10 years with other friends. I’m excited that the two of us are finally going backpacking again.
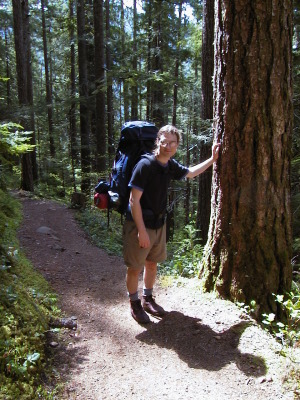
It’s interesting for me to compare the weight of our basic equipment and how it is has changed in those 7 years. I still do a good amount of bike touring and backpacking with friends and camparound 10 nights per year.In the past 5 years almost all of mygear has changed and I’ve bought it with an eye for lightweight and compactness. On our last trip to Lena Lake we used a Sierra Designs Alpha CD tent that weighed 9lbs with groundcloth, it has been replaced by a Tarptent Rainshadow II that weighs 3lbs with ground cloth. My old backpack (a huge Kelty internal frame model) weighed about 8lbs too and has been replaced by a Mountainsmith Ghost at under 3lbs. The sleeping pad weight is about the same, but a 1″ thick Thermarest has been replaced with a 2.5″ thick Exped Downmat. Our synthetic and bulky 3 or 4lb sleeping bags have been replaced with sub-2lb down bags.

As a result the weight of a my setup (backpack, tent, sleeping bag, pad) is 9lbs. In 2007 I think that same basic setup was over 20lbs. That is a significant difference. The weight isn’t the only difference, the volume of gear is smaller (mostly due to the lighter weight tent and down sleeping bag). In the photo at the right (taken at Lena Lake) my backpack towers up to my head — the smaller one barely reaches my shoulders.

Now I just need to avoid making up for it by carrying too much food and camera gear– my normal failures.
A great travel blog

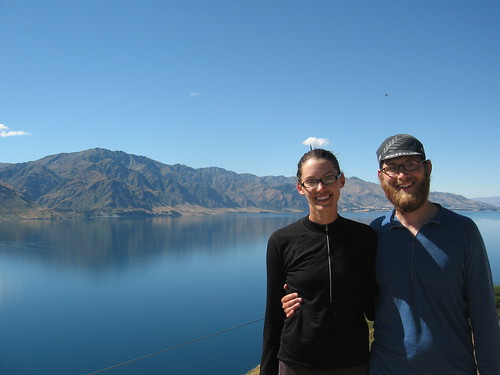
Sarah Erck and James Welles are touring around the world on bikes for their honeymoon.

Today’s post(The Suicide King)is a great example of why cyclotourists should be reading their blog. It’s well written, funny, and informative.

I met them just before they left. James was working at Microsoft and I bought a GPS from him and found out about his trip. The three of us met later for lunch and I gave them some guidebooks for touring in New Zealand. Great folks and I’ve really enjoyed their blog. I hope that they end up back in Seattle after the trip so that I can hear some of these stories in person.

I also appreciate that they are being very upfront about the finances of their travels and writing about the good and bad.

Other favorite entries: Goodbye(funny) and A Day in the Life of a Cycle Tourist: NZ (useful).

Cargo Bike Memorial Day Ride

A lot of my friends celebrated Memorial Day with Seattle’s 8th XtraCycle ride — this one was organized by Ro Cooper and called the Cargo Bike Jamboree. We met at Pike Place Market and rode down to Lincoln Park in Seattle for a BBQ and Picnic. Everything was carried by bike, coolers, grills, food, beer, fun bikes, chairs, etc. The weather was fantastic and everyone had a great time. Click the group photo above to see the rest of them.

To find out about the next ride (probably on the 4th of July) keep an eye on the website for Aaron’s Bike Repairor Point83.

I don’t have an XtraCycle and these are XtraCycle rides so I brought my “extra cycle”:

I need a destination

Mark Vande Kamp and I were out for a ride last night and had a conversation which gelled some of my recent thoughts.

I can really only motivate myself to ride when I have a destination in mind. For me this really boils down to two types of riding. Commuting and touring.

In 10+ years I’ve never been much of one for just getting on my bike and riding 20/50/100 miles and ending up at home again, especially if I’ve done the ride before and I’m just riding solo. I don’t really feel like I’ve acheived anything but fitness, and cycling is about more than fitness for me. When I think back on my “just go out for a ride” type rides the enjoyable ones either all had a purpose or were more social events than riding.

Commutes I can do solo. The long form of my commute is 25 miles and I ride it a couple of times a week in the spring and summer. There are two routes to take and both are enjoyable for different reasons. The medium length commute is 10 miles and I do that on my other days. This makes it trivial to rack up 80-100 miles of riding every week during the summer. I also use the term commute lightly, commutes include any riding where I’m riding from one point to another. Riding to have dinner with friends? Riding to the grocery store? Both are in the rough “commute” area for me.

This year I’m making a big push back towards touring. I kicked it off with a overnight ride with the point83 club a few weeks ago. I hope to do one overnighter per month through the summer. In July I have a week long trip planned with Larry and John (my normal touring buddies — Larry and I have been doing week long tours for almost a decade). Touring is the ideal pleasure ride — I have a destination, there are no repeats, and the tours often involve riding with a friend or two.

This weekend I have two destination rides planned. Tonight I’m riding to a friend’s cobb pizza oven party. Sunday I’m going on Ro’s cargo bike ride to have a memorial day picnic in West Seattle.

Alistair’s Rack Jig and the start of another rack

Alistair showed me photos of his rack jig a couple of months ago and I finally got around to building one myself. The core piece is some sort of holder that we got at “Science, Art and More”, a fun science oriented store in Seattle. It consists of two tube clamps with a center pivot that can be rotated 360 degrees. Alistair added two other tube clamps on stalks, one for the frame or fork and one for the rack top. Using this you can position the rack top while you braze in the stays that will hold it in place on the bike. Click the image for more photos.

After building the jig I added the fork crown mount to one of my rack tops. I like how this one came out:

The bolt that goes through the fork crown is just a standard steel M6 bolt bought from my local hardware store. I cut off the head and brazed it to some 1/4″ tubing. Finally I put a 5/16″ sleeve around the bolt to provide something for the nut to compress against.

Nothing groundbreaking, but it is a little smoother looking than the similar design on a Nitto M12.

A different way of measuring while bending tubing

Yesterday I made my second small front rack top and it was the second time that I had trouble with the measurements for bending tubing (using a lever-style bender). While sitting down with a piece of scrap and the bender I figured out an alternative way to compute bends.

Swagelok has a the best manual for lever benders that I’ve seen. The information is good for any brand of lever bender (I have two benders, neither is made by Swagelok). Starting at page 13 there is a discussion on the gain calculations for figuring out where to place bends for making a polygon.

I’ve had problems with the Swagelok method ofcomputing gain because asmall mistake anywhere in the process can cause problems elsewhere. Yesterday I made either a computation or measurement error and madeone bend 1/2″ earlier than I should have. I ended up splicing twopieces together to recover. Since the Swagelok method has you map out all bends before you start any small errors at end bend will compound.

I figured out an alternative that is easier for me to use.Instead of marking only the end of a bend I’m marking both the start and end of each bend and measuring the straight section of rack between the bends. Using the bender radius I can compute the desired lengths of the straight sections.

In this example I make a roughly 5×7 rectangle (good for a handlebar rack) out of 1/4″ tubing using the Ridgid 404 bender. It has a 5/8 radius.

For a 5×7 rectange the long straight sections would be 7-(5/8)-(5/8) = 5.75″ and the short sections would be5-(5/8)-(5/8)=3.75″. To make life a little easier I rounded these up to 6″ and 4″. The rack will be 5 1/4″ by 7 1/4″, which is still a good size.

Using the radius of the bender I can compute the circumference of the bend that I’m making. For a 90 degree bend it is (pi*2*r)/(360/90). r is 5/8, so this gives me .98″.

The Process:

In this example I’m going to put the seam along in the center of one of the ~5″ sections.So I measure 2″from the end of the tubingand draw a line. .98″ from that lineI draw a second line. To bend I align the first line with the 0 point on the bender. After a 90 degree bendthe second line will mark the start of the new straight section.

I continue this process working around the rack. This photo shows us at the halfway point.

At the final bendIdo the same thing, but I also do something else to check my work. Using a square aligned with the center of the first piece of tubing I draw a third line in between the two normal ones. I put a S through it (square) making a $ sign. You can just barely see this in this photo, but it is clear in the next one.

The $ line will line up with the 90 degree mark on the bender:

I cut the tube to 2″ past the last line and bend:

Here is the final product:

It is about 5 1/4″ across (center to center). We used 4″ straight sections and the bend radius is 5/8″. 4″ + 5/8 + 5/8 = 4 10/8″ or 5 1/4″.

You’ll notice that I never had to measure any fractional numbers except for the bend circumference. I set your calipers up to the bend circumference and locked them in place. This let me use the ruler for the straight line measurements and the caliper for the bend marks.

The same technique should work for non-90 degree bends, you just need to figure out the circumference of the bent area. The formula is simple: (pi*2*r)/(360/degrees). So a 60 degree bend with a 5/8″ bender would be (pi*2*(5/8))/(360/60) = .65 (or 21/32nds). I’m going to be building some front lowrider racks with trapezoidal shapes next and will use this technique there.

Re-raking forks for low trail

On Sunday a group from Point83 got together at a local bikeshop and re-raked some forks. Val Kleitz (used to own Bikesmith and bike mechanic extraordinaire) was there for a couple of hours to lend some advice.

The goal of re-raking the forks was to add additional offset to decrease the bicycle’s trail. This improves the bike’s handling when riding with a front load, even a small one like a handlebar bag.

I brought 4 forks to re-rake:

1,,,,) A Jamis fork that was supposed to be disposed of anyway. It was built about 1.5cm too short and replaced under warranty. I did this fork first because I didn’t care what happened to it.

2) A 1986 Trek 400 fork. I’ve been trying to sell this at the Seattle Bike Swap for $5 or $10 for the last 3 years with no interest. I don’t own the frame that it was on any longer. It will have cantilever bosses installed for 650B and available as a low-trail demo fork to friends. It is already too short for 28mm wide 700C tires with fenders.

3) A 1983 Trek 630 fork. This fork has 25,000 miles on it and needs to be repainted. I reraked it the least, changing the offset from 10mm to 20mm.

4) A 1994 Bridgestone RB-T fork. This is from my RB-T, one of the ugliest in existance due to being touched up at random spots with purple nail polish by a previous owner.

Point83 and BOB list member Andre also brought a early Trek mountain bike that he was using as a load hauler with a large Wald basket. He wanted to re-rake this bike’s fork to have a trail of around 40mm for carrying heavy loads.

We primarily used two tools to re-rake the forks. A Hammill fork blade bender was used to increase the offset in each fork’s blade. This bender has a radius of 10″. Using the fork leg bender does take the fork out of alignment, so we used a VAR fork alignment jig to realign the fork after getting to our target offset.

Val showed us a great trick for checking fork offset. Draw a line on a sheet of paper and place the fork on the paper with the dropouts aligned along that line. Use an angle finder (or bubble level) to hold the fork’s steerer tube at 90 degrees. Now look down the steerer tube of the fork and down a line on the paper along the center of the steerer. This is easier and more accurate if one person holds the fork while the other looks through the steerer. If you measure that to the reference line for the dropouts you’ll get the fork offset. I checked this with two forks that I knew (the published) offsets for and the results were accurate. Andre drew this great drawing that shows how it works:

The bending worked for forks with no canti bosses or canti bosses set for 700C wheels. When we tried to bend Andre’s 26″ MTB fork we found that the canti bosses were placed too low and ran into the mandrel of the bender. This fork was re-raked using a Park leverage tool.

Even bending with a normal radius the fork height didn’t change too much. It was pretty easy for me to measure the Jamis fork (I had a reference wheel/tire which just barely fit before) and the dropout to fork crown changed by about 3-4mm when we increased the fork offset by 20mm (going from 45mm to 65mm).

This photo shows a stock (in grey) 1983 Trek 600-series sport touring fork and a re-raked one (in gold) which has had 10mm of offset added to it.

With these two photos you can see that the tire clearance did not decrease too much when adding rake to the fork. The tire is a 700×35 Panaracer Pasela, larger than what I’d use with these bikes. Tom Matchak’s article on re-raking gives you the math for figuring out how much the fork length will be reduced through re-raking. Note that his measurement is along the steerer and overestimates the amount of clearance lost in most cases.

Office Chair Racing

Last night Christine and I went and watched a bunch of folks race Office Chairs down the hill behind the Seattle Times.

All photos here. I learned about it from the point 83 forums.

Enough text — here are the good photos:

(no cars were harmed in the making of this photograph — oh well)

That is a Bakfiets from Clever Cycles.

Our experiment as a two car family is over…

It started in June 2002. Christine and I needed a new car. At the time I didn’t know how to drive, so we sold her Honda Civic and bought a diesel VW Jetta Wagon. That car was the most expensive item that I had ever purchased besides my house or education, so I thought I should learn how to drive it.

Learning how to drive gave me a new sense of freedom. I know that is a common reaction, but I didn’t think it would be my reaction. I didn’t care about using the car to get to work, but it gave me the option of going hiking (without Christine) or going to visit friends in Olympia or Missoula much more easily than I could in the past. The two of us shared the single car for about 6 months before I bought my own car in Feb 2003.

The funny thing is that I rarely used my own car as intended. Sure, I did drive out to Missoula or Olympia a number of times while owning it. I don’t think that I ever used it to go hiking (without Christine). I did use it for a few bike rides. Mostly it got used to get to work.

Yes, I drove to work. For a year. I did it so much that I actually sold the Jetta and bought the car that I really wanted, a VW Golf TDI.

After a year of driving to work (it was now Jan 2005) I looked back and realized that I didn’t really like driving to work. I had to deal with traffic. Sometimes it was faster than taking the bus, but only if I left really early. I missed talking to friends on the bus and having different routes every day. I missed being on my bike every day. In driving I learned a million ways to avoid SR520 (the highway between home and work) that I really didn’t need to know.

So in Jan 2005 I decided that I’d only “allow” myself to drive at most once a month. That was easy and it turned out that I drove to work about 10 times in 2005. In 2006 the number was even lower. I was getting tickets from the Seattle of City because my car never moved. I started to think about selling the car. It was a hard decision — buying this car was complicated and involved a few sleepless nights and a cross-country drive in the middle of December. It’s hard to sell something that you were so invested in acquiring. I also see the car is not being replacable — used TDI prices are just too high right now for me to justify another one.

In the first 14 weeks of 2007 my car only drove 180 miles. That is just over 10 miles per week. When Christine and I looked at this number it was obvious that the car needed to go. So last week the car went in for a detailing and was listed on craigslist. TDIs are popular (and I knew this) and it instantly got a ton of interest. The second looker was serious, had it inspected by a mechanic yesterday, and is buying it today.

I’m looking forward to going back to being a one car family.

Comments are fixed

I just discovered that people have left dozens of comments that I needed to moderate. Sadly there were dozens of other bits of comment spam (there were 123 unmoderated comments total).

Anyway, the non-spammy comments are unleashed and I’m slowly going back and reading them.

I’ll figure out how to get notified when new comments come in so that I don’t sit on them forever.